"Therefore everyone who hears these words of mine and puts them into practice is like a wise man who built his house on the rock...But everyone who hears these words of mine and does not put them into practice is like a foolish man who built his house on sand."-Matthew 7:24-26 (verse used in the movie "Voclacno" (1997)
I've (Sal) been renting since graduating from UMM in 1999. I decided to do a photo gallery of the places I've lives so far:
Me in the Kitchen at E. 7th St.
My father was in the real estate->landlord (renting houses) business too back in the days...see story.
109 W. 7th St; Apt. 2 (June 04-Present)
South View of the Living Room
West view of the Living Room
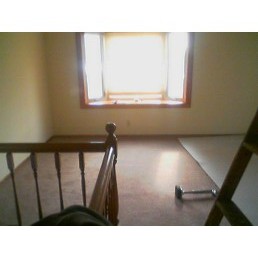
North view of the living room
East view of the living room
Gardening/Landscaping
Want to make your front/back yard looking beautiful? After renting in Morris, I would like to make the place I'm currently (5/13/05) residing more colorful. I plan to contact my landlord about gardening, so I decided to do some research on this...
-Gardening
A beautiful orange flower at bloom (June of 2007) during a Minnesota spring
If you want to save money, I've heard rumors that it's best to purchase them from the East Coast (North Carolina, Virginia, New Jersey-affordable group)
IKEA, scandinavian based (located by Mall of America in Bloomington, MN Slumberland, a friend (Terrence G.) used to work here in St. Paul
"..-----Question-----
My tub drain was very slow. I plunged it several times, did get some crud out of it...now the first time to take a shower after that, it is totally stopped up. Water does not move at all. The drain has an opening looks like a circle divided into four cross bars. What do I do?
-----Answer-----
Hello
The crud you got back is soap, grease and sludge. If you do not have a drum trap, you can access and clean drain by removing the waste and overflow cover, Not as easy as sounds if it is a trip lever style it could be full of hair, if you remove the 2 screws, that hold it on tub and pull up they usually pull hard but hair and all will come with as a rule. I do however say if you are unsure hire a pro as they can be trouble. I do also recommend Bio-clean for maintaining drains.
Hope this helps DB Let me know if need more help. New mall open www.dispatcherbobs.com
...
Answer
Hello
WELL sometimes they are plugged further down, you can run a sewer cable down until you get it to drain, or as stated hire a pro. Tub drains can be hard to clean they lime up, soap scum up, fill with hair. I always hated to do one because most homeowners do not understand, the person or plumbers who plumb houses, do not install clean outs for future maintaining of drains, and when we suggest to install, we get an answer like well it has done with out all of these years. I can not stress enough to home owners drains are like arteries, they fill up and need to have the proper diet so to speak. Or a good maintainenc plan.
Not knowing all of the basics, how it is piped, it could be plugged in the first couple of feet or as far away as 30 feet. I would call a professional at this point. As renting a drain machine cost about as much. DB..
"
Having a bathtub drain clogged can be quite annoying. After all, you want to see the bathwater drain away quickly and take its unsightly bathtub ring along with it. Unfortunately, this doesn't always happen, most likely because the bathtub drain has become plugged with hair and soap. If that's the problem, here are some suggestions to help you repair the clog.
Your first impulse might be to reach for the can or bottle of trusty drain cleaner. But, hold on just for a minute. Here's another solution might just work, and if it doesn't you can always revert to the chemical solution. Begin by pouring cup of salt down the drain and then flushing it with lots of boiling water. Keep the hot water flowing in order to push the clog on through, and your drain should be good to go once again. This usually works quite well, unless the drain is plugged with something plastic or metal.
Next, try using a plunger. This usually works, as long as you remember to plug the overflow. In order to do this, you have to remove the two screws that attach the overflow plate and then remove the components, including the stopper. Clean these items up using soap and water, being careful to remove any hair, grease, or anything else lodged on them. Now, plug the hole in the tub with a rag and use the plunger to force water down the drain, dislodging the clog in the process. If all is well simply replace the stopper assembly, cover plate and mounting screws.
If this doesn't work, the next step is to try to clear the clog by inserting a flexible wire, usually an unwound coat hanger, into the drain hole. Coat hangers are ideally suited for this purpose, as they are just flexible enough to work their way through the bends in the drain pipes, as well as stiff enough to dislodge anything that could causing the clog. Wrap one end of the hanger wire with a cloth or wear a glove in order to get a firm grip on the wire. Push it through the drain as far as you can, working it back and forth as necessary. If you can't seem to get the wire through the pipes, try inserting the wire through the overflow opening.
If this doesn't clear the clog, the next step would be to try using a plumber's snake. These are inexpensive and it's a good idea to have one handy. Just insert the wire wound tip into the drain as far as it will go. Tighten down the binding screw onto the snake and twist. As the tip turns inside the drain, it will grab onto of anything it finds. If it's only a bend in the drainpipe, the snake will work itself around the corner and you can push it further into the pipes. If you have to go more that three for four feet, you probably have a more serious problem and should call a plumber.
If none of these attempts to clear the clog work satisfactorily, try the chemical solution. Chemical drain cleaners are usually safe for septic systems, but are caustic and dangerous when mixed with water. You should never use them in combination with any other chemicals. Wear safety glasses and protective gloves before opening the container and emptying the contents into the drain. Be sure to read and follow the instructions provided on the label.
Finally, these suggestions don't work it's probably because the clog is deeper into the pipes than you, or the chemicals can reach. It's a good time find a phone book and call a plumber.
"...For a very large clog or one that's far from the fixture, rent an electric power auger ($15 to $30 per day). This machine—basically a large cable auger powered by an electric motor—is very effective at cutting through virtually any clog, even tangled tree roots. Before bringing home a power auger, be sure the rental agent shows you how to safely dispense and retrieve the cable. ...
"...Unclogging the Main Drain
Main Drain.
If more than one sink, bathtub or toilet is clogged, you'll need to clean out the main drain line or the sewer.
1. To clean out the main drain line, find the clean-out plugs located on the large drain pipes. Look for these plugs on the vertical pipes in your basement or crawl space. In some houses these drains may be located in a garage or pantry closet, or there may be access to these plugs outdoors along the foundations of your house. Usually these pipes will be vertical, but occasionally a plug may be located on a horizontal pipe.
2. When you find a steel or plastic cap for the pipes with a square fitting at the top, remove the fitting with a wrench. Be sure to have a waste bucket in place when opening up the drain.
3. Use a plumber's snake to break up any clogs. Make sure to insert the auger in both directions of the pipe. You can also use a powerful stream of water from your garden hose to break up any debris.
4. Replace the steel cap of the drain pipe.
...
-Inspectors A Better Inspection, company my brother went through (Saturday, January 26th 2006)
*tips he gave to my brother:
-Air Furnace-use 80% efficiency instead of a higher one because a 100% efficient works too well that it leaks water, which causes the metal to rust more
-electric outlets (hometime-how to projects)) should be checked with a special outlet inserter to see if the outlet is screwed on tightly. Also, some outlets are not necessary (water proof); however, the house we look at had a GFCI (3 pronged)
-look at the ceiling of the upstairs and there was enough plaster to prevent leaking for a good while (20+ years) in the roof (do it yourself roofing)
Praise Report-Testimony of Purchasing my 1st House
Purchasing this house came with an awesome testimony/story! Before this house, I was looking at 3-5 different houses in the market. I started in the month of March, hoping to be moved in before my rent/lease ended in my other rental unit (109 W. 7th St.)-end of May! I didn't make an offer in this house till mid-May! Yes, I was chugging to get all my paper work done! I kind of knew that I wasn't going to be moved in to this new house before the end of the month, so I was planning to find a temporary place to stay for several weeks and have my "stuff" stored till then. With God watching over my situation, I was able to rent the house I was hoping to own-thanks to the owner (friend of a new co-worker that just started in my current very new temporary job at the Stevens County DAC)-praise God! I didn't have to store my "stuff", but have it all moved in one single move. I'm glad this opportunity came because I began to appreciate this more after several days of moving in the last days of May. I had so much "stuff", which I didn't realize I had so many until during the long...I mean long move! God provided the many friends to help move-some were "last minute" helpers and "last minute" vehicles (e.g. boss' suburban). God is good...all the time!
I was able to officially own the house on the 23rd of June! The story doesn't end here... I was expecting to make a check of $3-4K as a downpayment according to previous paper work before the "closing date" (day of owning the house). I came to Homeland Mortgage with my checkbook and ready to write the amount. The loan agent (Katie) ended up giving me a check of $9+ because I payed too much for my downpayment/appraisal feel of $350. I didn't have to write a single check! The story behind this is "giving to the Lord". I wrote a $100 check donation to my local church ministry school (SIMT) a week before this "closing date" as a THANK YOU to God for his miraculous provision the whole month of June...
-$100 check from my dentist (reimbursement from insurance)
-$350 check from the lady I sold my old Chevy Blazer SUV to last year!
-$200 transaction to my checking account for my recent hospital visit (reimbursed from my FSA Account through my ft-job of 7 years)
-$375 check from my damage deposit refunded from my past landlord
"Darik and Melissa Romberger and their three children have been announced as the third partner family for the Habitat for Humanity of Prairie Lakes, Stevens County Chapter.
The announcement was made during a pancake breakfast fundraiser Sunday in Morris.
Chapter President Gordon McIntosh introduced the family. They include, Kaitlin, who is five months old, two-year old William and Michael, who is five.
The Romberger home will be built on West 11th Street in Morris. "
by NuTone
*this is the one that my electrician installed in my basement bathroom "Combination bathroom ventilation fan, light and heater. This system has a fast-warming heater, a ventilation fan, and a single 100-watt light, all in one small package. All three elements function independently or together. The heater is handy for cold mornings and is designed to heat the room quickly. It is ideal for a bathroom or a utility room, and the white polymeric grill cover matches most any decor. Designed for easy installation, it installs within a 2-inch by 6-inch construction. The light lens is easy to remove for bulb replacement. Requires a single 100-watt bulb (not included). "
"
Indoor Air Unit
(800) 798-9050
(651) 201-4601
Indoor Air Program
PO Box 64975
St Paul MN, 55164-0975
About Radon Levels
in Stevens County
The average national indoor radon level is 1.3 pCi/L. (What is a picocurie?)
The average indoor radon levels of Stevens County, as determined by radon test results from Air Chek, Inc, is 7.5 pCi/L Stevens County: Public Health
*see 2010 Internatonal Students help put sheet rock (walls) as part of their community initiative project (1 of 5) during orientation week (August 17th-19th) Dedication of Habitat Home in Morris held Saturday, Published October 30 2010 morrissuntribune.com
A dedication ceremony was held Saturday at the Thrivent Builds with Habitat for Humanity home on West 7th Street. "Habitat dedication
Christina, Fiona, and Patrick Reimers received the key to their new home as part of the dedication ceremony Saturday for the Habitat for Humanity home on West 7th Street.
A dedication ceremony was held Saturday at the Thrivent Builds with Habitat for Humanity home on West 7th Street.
Taking the keys to the home were Christina, Fiona, and Patrick Reimers. "
Looking for a place to rent in Morris? Contact Sal (320) 585.5573/(651)338.2929 or goodnewsmorris@yahoo.com and I'll (Sal) share with you about my personal reccomendations of local landlords I've had in the past:
1999-2001 Friend's House
2001-2002 Dale Ritter- 1BR (712 E. 7th St; Apt 2)
Tim, Sal, and Juan posing at the living room=>
2002-2003 Kevin Evink 3BR(105 E. 1st St.)
2003-2004 Geyen Properties (College Rentals-Marleen) 1 1/2BR (311 1/2 E. 9th St.)
2004-Present/2006 Fredrick Farrell 3BR(109 W. 7th St; Apt 2)
"The City Council created the City of Morris Rental Housing Commission in late 2007 with the purpose of improving the quality of rental housing in Morris by creating commonly acceptable solutions to problems that arise among landlords, tenants, and community members... Landlords and Tenants: Rights and Responsibilities.
Natural gas service has been restored to 3,100 of the 3,600 CenterPoint Energy customers in Morris, Hancock and Benson left without service since Friday afternoon. "...Natural gas service has been restored to 3,100 of the 3,600 CenterPoint Energy customers in Morris, Hancock and Benson left without service since Friday afternoon.
CenterPoint is down to 500 customers still without service, many whom were not home over the weekend. CenterPoint representative Becca Virden said technicians had been to each of the 500 remaining homes at least twice trying to gain access to relight pilot lights.
If your service has still not been restored, the phone number to call is (612) 372-5050.
Virden said some of the customers without service are “snowbirds” who have already left the area for the winter season. Virden said that if residents know neighbors are gone, it would help to contact them about the incident so CenterPoint can restore their service.
Virden emphasized that the work of local law enforcement and elected officials helped the restoration process go smoothly.
"You are very fortunate to have the police, fire, and public officials you have. This restoration went very smoothly,” said Virden. “We can't say enough. They went the extra mile for us.”
The outage was caused after a piece of farm equipment hit a Northern Natural Gas pipeline (Northern) Friday afternoon. Northern is CenterPoint Energy’s natural gas supplier. Stevens County Sheriff Randy Willis said the farmer was laying tile in a farm field when the line was hit. The incident is still under investigation.
More than 100 technicians were in the area over the weekend trying to restore service. Extra technicians will remain in the area through Monday and Tuesday to continue restoring service.
For safety reasons, the company urges customers not to turn any valves or tamper with the natural gas meter. Opening or turning any valves could allow air to enter the natural gas lines, which would hinder the re-pressurization process.
If someone smells natural gas inside or outside the home, they should follow these steps:
• Leave the area immediately and on foot
• Don’t do anything that could cause a spark (turning on lights, driving a car, etc.)
• Call CenterPoint Energy gas leak emergency-24-hours @ 1-800-296-9815 and 911 from a safe location."
Windows
18x42 Window Well Cover
Amerimax Home Prod
Model: 75260
Do it Best SKU: 100447
Online Price: $34.49 Plastic Window Well Cover 40"W x 17"H, $28.86
Product Specifications:
Variation: Gray Poly
Dimensions: 40"W x 17"H
Model Number: Window_Well_Cover_4333612
Menards® SKU: 4333612
"..
Windows can be one of your home's most attractive features. Windows provide views, daylighting, ventilation, and heat from the sun in the winter. Unfortunately, they can also account for 10%-25% of your heating bill by letting heat out.
During the summer, your air conditioner must work harder to cool hot air from sunny windows. Install ENERGY STAR®-qualified windows and use curtains and shade to give your air conditioner and energy bill a break.
If your home has single-pane windows, consider replacing them with double-pane windows with high-performance glass—low-e or spectrally selective coatings. In colder climates, select gas-filled windows with low-e coatings to reduce heat loss. In warmer climates, select windows with spectrally selective coatings to reduce heat gain.
If you decide not to replace your windows, consider following these tips to improve their performance...
"Why is West Central Communities Action sponsoring this project?
Group Workcamps, Inc. contacted West Central Minnesota Communities Action, Inc. (WCMCA) because it wanted the opportunity to bring this service to Western Minnesota. It fits WCMCA’s mission and provides an opportunity to partner with other community agencies and organizations. WCMCA, Inc. will be co-sponsoring a Group Work Camp Project in Morris in the Summer of 2010.
Why do we need this service?
The West Central area of Minnesota has many households on low or fixed incomes that may not qualify to receive services from any other source. Many are not physically or financially able to make needed repairs to their homes." 3 Counties Benefit from Work Camp
December 10 kmrskkok.com "
A free home improvement program for Stevens, Pope and Grant Counties will engage teens in community service.
This summer 300 to 400 teens will descend on the three counties for a work-group-camp with West Central Minnesota Communities Action.
Randi Bryan Pajari, a coordinator of the project, says that they are accepting applications for the program and also looking for volunteers to help with the camp. The Stevens County Commissioners approved a resolution to fund the camp $5,000 dollars and Pajari said she has requests for assistance out to Pope and Grant counties as well.
The work will be performed from July 19th to 23rd. For more information call 1.218.685.4486.
"Lance Boudin of Carlos feels blessed and gives most of the credit to God for who he is today.
Boudin also credits Him for where he is today – living in a newly constructed home; a home he never dreamed he would ever have.
"I am standing in a house that I am paying for,” Boudin said of his home on 8th Street in Carlos. “I feel like I got a Porsche for a Volkswagen price.”
Boudin moved into his new home on May 1 and has already made his first house payment.
"It was exciting,” he said. “I felt very proud.”
The reason for Boudin’s excitement now is because in 2003, he was convicted of a felony-level crime and incarcerated in the state prison system in Red Wing.
In 2005, he was allowed to take part in the work release program – Institutional Community Work Crew (ICWC), a state program under the direction of the Minnesota Department of Corrections. Through this program, Boudin helped to build houses similar to the one he is living in today. The homes were built throughout the state, including some in Douglas County.
While building one of the homes, Boudin expressed an interest in owning one himself one day.
On Wednesday, Boudin was recognized during a special June Homeownership Month event at his house sponsored by USDA Rural Development. Boudin became a homeowner because of the USDA Rural Development’s direct home loan program, along with the West Central Minnesota Communities Action (WCMCA) program.
The recognition ceremony included representatives from USDA Rural Development, WCMCA, State Representative Mary Ellen Otremba and Toni Merdan from Representative Collin Peterson’s office.
Boudin’s home was built through a partnership with WCMCA, which uses minimum-security labor to build homes in the area. The program serves as rehabilitation and job skill training for inmates, such as Boudin, who served in the program a few years ago. In fact, two of the homes he helped build are in Carlos and in close proximity to his own home.
Besides God, Boudin also credits the WCMCA program for helping him to turn his life around. Two key people from WCMCA who he gave thanks to were Mike Payson and Jennifer Kangas.
He met the two in 2007, which is when he told Kangas he wanted to own his own home. That is what got the ball rolling.
Boudin said through twists and turns of fate and through the work of God, he ended up in Douglas County. He is originally from the North Branch area.
While working for the ICWC, Boudin met the owner of New Millennium Cabinets in Alexandria, Brian Springer, who gave him the opportunity to have a job.
At the time he decided to move forward with getting the loans to build his house, Boudin was laid off.
"I had a conversation with God and told him if this was meant to be, I needed to find a job,” Boudin explained.
Three days later, he got a job at Standard Iron. After three months, he was laid off – again.
Luckily, Boudin said he had put money away, but found out that in order to take part in the WCMCA program and to receive funds from the USDA program, he needed to have a job.
After another conversation with God, he said, Boudin met a woman at his church and about two days later, he received word that he could start working at Bistro to Go.
"I have been there ever since,” he said of his newest job.
"I asked God if he wanted me to be here, he needed to help and he did,” said Boudin. “I couldn’t have done this without Him and without the help from a lot of other people.”
Although humble and modest about giving credit to himself, Boudin noted that people have to have the will to change, which he did.
However, God received most of his credit, along with the ICWC program, the people at WCMCA and the people at USDA Rural Development.
"God has a plan for everyone, you just have to submit yourself," he concluded.
For more information about USDA Rural Development, visit its website at www.rurdev.usda.gov/mn.
For more information about West Central Minnesota Communities Action, visit its website at www.wcmca.org.
Tags: lance boudin, news, local, carlos, homeowner ."
"...Variation: Textured White
Dimensions: 28"W x 31"D x 61.75"H
Model Number: GTH16BBXLWW
Menards® SKU: 4643012
..
*Subtotal: $476.00
Shipping: $0.00
Tax: $32.73
Order Total: $508.73 (w/$81 s/h for over 40-50miles delivery) Register On-Line: Ownership Registration Certificate GE Appliances GE.com
"ALEXANDRIA, MN, - "MN appliance rebate" was one of the hottest search trends on the internet early Monday morning. As of 10:30 a.m., the state's website www.mnappliancerebate.com had crashed due to the high interest in the Trade-in & Save Appliance Rebate program that started at 8 a.m. Monday morning.
The telephone hotline that was set up to field questions from interested callers, was also overwhelmed. As of 11 a.m., the toll free phone hotline was working again, although callers could expect long wait times to speak with a representative.
The Trade-in & Save Appliance Rebate program had been funded with more than $5 million in federal stimulus funds, and will enable more than 25,000 Minnesota households to earn up to $200 for replacing a refrigerator, freezer, dishwasher or clothes washer with a qualifying ENERGY STAR model purchased from a Minnesota retailer.
Consumers must act fast, because when the federal money runs out, the program would end. The Minnesota Department of Commerce expected the money would run out in less than a week.
According to the Minnesota Department of Commerce, the appliances eligible for a rebate and rebate amounts are as follows:
* Clothes washers ($200)
* Dishwashers ($150)
* Freezers ($100 with purchase and proof that the old unit has been taken off the grid; $50 for purchases only)
* Refrigerators ($200 with purchase and proof that the old unit has been taken off the grid; $100 for purchase only)
This program was part of the American Recovery and Reinvestment Act and was expected to to save more than 2.2 kilowatt hours in electricity, almost 44-million gallons of water and more than 4.7 million pounds of carbon annually.
The Trade-in & Save Appliance Rebate program hotline is 1-800-657-3710 or you can call 1-877-230-9119.
Written for the web by Cristi Jessee."
"Concrete moisture is one of the most overlooked issues in the construction industry. Often disregarded, the results of moisture and concrete related elements are seen years after a project is complete. Your next encounter may be seen in the form of bubbles, oozing of adhesives or flooring that curls. .. Concrete Moisture Testing, from americanmoisturetest.com
"..Detecting Radon Gas
Step 1
Improve the ventilation in your home (particularly the basement). Seal any cracks in the foundation. This may help reduce radon penetration.
Step 2
Cover any exposed earth walls in the basement. This will reduce radon entry.
Step 4
Install a radon detector in your basement (radon is a heavy gas and will tend to settle in the basement). Leave it for a few days (usually 3 to 7). At the end of the test period, send the test kit to the address on the package. The lab will interpret the test and provide you with the results....
Radon News Winter Biggest Threat of Radon Exposure, #2 Lung Cancer Cause
Submitted by MedHeadlines on 19 January, 2009 – 21:003 Comments "..It’s this natural tendency to stay indoors and even underground at this time of the year that has led the US Environmental Protection Agency (EPA) to declare every January as National Radon Action Month. Radon, a naturally occurring gas, seeps from the soil into our homes and leaky, drafty basements are especially vulnerable. ..
Radon Mitigation . How to Install Exterior Radon Remediation System
"http://www.MitigationSystem.com - Radon Mitigation 1-800-420-3881. Installed by Air Quality Control Agency, America's Largest Radon Company. How to Install Exterior Radon System. Radon Abatement System Installation Video. Two Story (2-story) Radon Remediation with Outside Fan. "
Environmental
Energy Costs, Posted at: 10/08/2008 03:12:48 PM KSAX
"Governor Pawlenty announced today that $10 million is now available for micro-energy and conservation home improvement loans to help Minnesotans save on energy costs.
The program was proposed by the Governor in his 2008 State of the State Address as another way for Minnesota to expand homegrown energy, grow green collar jobs, and improve the environment.
"It's more important than ever that we lead efforts to Americanize energy production and help homeowners lower their energy costs," Governor Pawlenty said. "This program will fund low-interest loans for micro-energy technologies such as home-based solar, next-generation windmills, geothermal heating, and other renewable energy sources."
Micro-energy and conservation loans will be made by the Fix-Up Fund, a statewide program that offers affordable, low-interest fixed-rate loans through Minnesota Housing's large network of lending partners across the state. Funds are available from repayments of previously made loans.
Under the loan program, homeowners are encouraged to get an energy audit from their utility company to determine the most cost-effective energy-efficient improvements. Interested homeowners can then apply for the loans directly through a Fix-Up Fund lender. Lenders are listed at
http://www.mnhousing.gov/consumers/lender/.
Projects eligible for micro-energy and conservation loans include:
*Renewable energy generation, including solar thermal, solar
electric and wind turbines or generators.
*Home improvements that are either Energy Star rated or qualify
for a utility rebate, including high-efficiency furnaces, boilers, water heaters, combination boiler/water heater, central air, air or ground source heat pump, and lighting fixtures.
*Thermal envelope improvements, including insulation and air
sealing.
Fix-Up Fund loan guidelines are:
* Maximum loan amount is $35,000
* Maximum loan term of 10 or 20 years, based on loan amount
* Maximum income at or below $93,100
* Borrower must be year-round owner/occupant of the home
* Borrower may hire a contractor or do the work themselves
* Eligible uses include single-family home, duplex, tri-plex or
quad
"These micro-energy and conservation loans will help Minnesotans with heating costs this winter while conserving energy over the long-term," said Minnesota Housing Commissioner Tim Marx. "Homeowners who increase energy efficiency or renewable energy sources will make their homes more affordable as we confront rising energy costs."
Last week, Governor Pawlenty announced that Minnesota received $144.5 million in federal funds for the Low-Income Home Energy Assistance Program (LIHEAP) for this year, nearly double the normal appropriation for Minnesota. The funding was released now to ensure states have the resources available to support their energy assistance programs as the weather turns colder.
LIHEAP is federally funded through the U.S. Department of Health and Human Services and administered by the Minnesota Department of Commerce through 38 local service providers around the state. The program helps low-income customers pay their heating bills through grant money paid directly to the utility company on behalf of the customer.
Minnesota also received additional funding for low income weatherization projects. The state currently serves 3,000 households with this program but will be able to expand that with the new allocation of $16 million. The weatherization program provides home energy conservation audits, safety inspections and assessments of furnaces and indoor air quality.
For more information on energy efficiency, the Low-Income Home Energy Assistance Program, or the Weatherization Assistance Program, contact the Minnesota Department of Commerce Energy Info Center:
* 651-296-5175 or toll free in Minnesota 1-800-657-3710
* Email: energy.info@state.mn.us
* On the web: www.energy.mn.gov"
"Let’s forget the green movement for a moment. The topic has exploded in the mainstream, but that growth has resulted in false claims and an unbelievable amount of greenwashing. The definition of what makes something green is subjective, making the issue as thorny as it is puzzling to consumers and builders alike.
So let’s talk in real terms. According to the EPA, the average household spends about $2,200 on energy bills every year. People in drafty old houses with single-pane windows, under-insulated walls, and prehistoric appliances are likely paying more. Simply put, saving energy will save people money.
Unlike green, energy efficiency is something that home buyers can understand, process, and wrap their heads around. As evidence of this, window replacement contractors say they have seen a marked increase in business since President Obama signed the American Recovery and Reinvestment Act of 2009, which included provisions for homeowners to receive a tax credit of up to $1,500 for energy efficiency improvements. The popularity of the Cash for Clunkers CARS program also highlights this trend.
For this reason, builders should think of energy efficiency as a prime construction strategy.
Where do you begin? Right here. In this story, you will find 10 cost-effective strategies that will help you build a better home--and one with features that your sales staff can quantify to potential buyers. There are other, more sophisticated strategies, of course, but these tried and true practices will give you best bang for your buck..."
*see GoodnewsEverybody.comScience: Environmental-Carbon Dating, Eco-Friendly, Green Living, Recycling, etc...
"Make sure that you use a glossy paint on the trim and on any doors that you might have...Transform one wall of the basement into a mirror. This can make the whole room huge.."
"..But perhaps the most efficient way to heat a basement would be the geothermal system. Geothermal systems may not be as common as electric heaters, as they are more complicated when compared with ordinary heating systems.
When the weather is cold, the ground surface may be cold, but the layers underneath have stored up lots of heat energy. The heat is untapped, and geothermal systems attempt to draw heat from beneath the ground. Water is used as the medium to tap into the heat energy. Via underground ducts or pipes, the water travels deep into the ground and stays there till its warmed up. The water is then transported back up, and the heat energy can be dispersed throughout the basement floors and walls.
In fact, this system is so energy efficient that the Environment Protection Agency (EPA) estimated a savings of between 20 to 50 percent. The only problem with the geothermal system is that it may require higher upfront investment. Mostly, the cost goes into installing the tubing. If you want to cut cost, you may want to install plastic tubing. However, in the long run, an energy efficient heating system can help you save on utilities bills.
If budget is the chief concern, then perhaps ceramic heating systems will suit you best. Energy Efficient Base Board Heaters, from professorshouse.com
-Insulation
*R value of 38 is highly reccomended for northern states!
I just purchased Johns Manville Fiber Glass Batt & Roll Insulation for my attic at Menards' "Zero Payments & No Interest 'til Summer Sale" (September 11th-17th of 2006). I can "Save Big" with an Energy Tax Credit! Cocoon Insulation Fiberglass Insulation in the Attic 2 - Installation "Staple it to the rafters or scabbed on boards with a staple gun so that the paper backing is toward the interior of the room to act as a vapor barrier. Use 3/8" heavy duty staples every six inches. Attach it by the paper flange so as not to compress the fiberglass. Make sure the paper flange and the staples are flat against the board to create an even surface for attaching the finished wall material." Attic Insulation 7, insulating rafters "Where the spacing of the rafters is uneven, odd-angled, or not standard, you will need to cut the insulation to fit. Cut it 1" wider than the necessary width, and tuck the fiberglass in to create a flange for stapling. "Insulating the Home, from lsu Urban Options-Weatherization
Houses/Apartment Rental Unites Availability
2-Story Duplex House:
Upstairs-2 1/2 Bedrooms (Available Now as of January 2006)
Downstairs-3 Bedrooms (not Available)
206 Maria Ave.
|(corner of Maria and Surrey St.)
St. Paul's East Side
next to Metropolitan State University
$725/month
All Utilities Paid
Landlord: Cansiano Monteagudo (since 1988 )
Call 651.731.9505
Homeowners Refund "
Filing due date is August 15, 2008. Returns can be filed up to a year after the due date. After that, you cannot claim a refund. The deadline for the 2007 return is August 15, 2009. The due date for the 2006 property tax return was August 15, 2007 but you have until August 15, 2008 to file."
"In this video, This Old House host Kevin O'Connor explains how to install radon mitigation.
Steps:
1. Mark hole location on basement floor for PVC vent pipe.
2. Drill series of holes around the pipe outline with a rotary hammer.
3. Use demolition hammer to chip out hole for PVC vent pipe.
4. Pull dirt from under floor with a drill fitted with a soil-auger bit.
5. By hand, dig out enough dirt to create a hole approximately 20 inches in diameter.
6. Set the vent pipe into the hole in the basement floor, then route it up through walls and into attic.
7. Stuff foam-rubber backer rod around base of the pipe; be sure it’s slightly below the surface of the basement floor.
8. Seal around the pipe with hydraulic cement.
9. In the attic, connect PVC pipe to an electric vent fan.
10. Continue the pipe from top of vent fan through the roof and connect to a roof cap.
11. Install system monitor in basement.
12. Drill 1-inch-diameter test hole in basement floor, turn on fan and then use smoke pencil to check draw of fan.
Real Estate Agents
Wanny chats about his real estate business with me on January 2005
Wanny Huynh, w/Edina Reality in Twin Cities housing market
311 Barclay St. (see map)
$260K ($1,700 mo w/principal 5.25%)
"
You may be eligible for a property tax refund based on your household income and on the property taxes paid on your principal place of residence, even if you rent. For purposes of the property tax refund, 15 percent of the rent you paid during the year is considered the portion paid for property tax. Use this information to help determine if you qualify and need to file Form M1PR to claim the refund...
"Pep Rally before the EXTREME build...Rally was held at NDSU and was put together in 4 days. It was a full house on the side I'm taping from and we had more cheerleaders and mascots together than they had ever seen! Great job, Fargo-Moorhead. Wonderful community spirit!" Cobbers Chronicle Extreme Makeover: Home Edition , from youtube.com
Pulling Together Extreme Makeover Style
"Celebrated for its ability to pull together during historic spring flooding, the close-knit Fargo-Moorhead community rallied together once again to build a home for the Grommesh Family through ABC's popular show "Extreme Makeover: Home Edition." Just blocks from campus, Cobbers shared time and talents to help share a story of hope."
*see GoodnewsEverybody.com Science: Weather, Natural Disasters, etc..-Floods of Fargo (ND-Moorhead (MN)
Extreme Makeover Fargo Moorhead Day 3
Extreme Makeover Grommesh words from producer , from youtube.com "Listen to him talk about the wonderful people that live here in the MN/ND region. Be proud! AMAZING"
Extreme Makeover Grommesh Family reactions
"finally the bus is moved and the Grommesh family sees their new home for the first time!"
Extreme Makeover Finale
"Deemed one of the largest turnouts for a reveal in Extreme Makeover: Home Edition history, the community rallied together to support a family known for "paying it forward."
"MINNEAPOLIS (WCCO) – The average household spends around $1,000 each year on heating and cooling bills. The good news is that there are ways to bring that down.
Programmable thermostats are one way to save money, but there’s some debate over how to maximize their efficiency.
A neighborhood in Eagan wants to know: are thermostats more effective when left at a constant temperature?
You’ve heard the tips when it comes to saving a buck on heating: open your shades to let the sunlight in, turn your water heater down by 10 degrees and change that furnace filter monthly.
Thanks to this good question, we have a way the experts say could save you around $100 every year.
“I kind of think it’s a girls verse guys thing, but my husband and I go back and forth on the temperature,” Eagan resident Lisa Johnson said. “When he’s not looking, I’ll turn it down, and when I’m not looking, and I’ll try to look, he’ll turn it back up.”
For many households, it’s become a full-fledged war.
In Johnson’s Eagan cul-de-sac, the war goes beyond finding the perfect temperature, it extends to how to save money in the process.
While Lisa Johnson believes in setting the thermostat lower during sleep and work hours, her husband, Ron, begs to differ.
“My husband is adamant that it should be set at a certain temperature, year round, all the time, never go up, never go down, because he says it costs more money to get the thermostat up, or to get the furnace, up and running,” Johnson said.
WCCO-TV took the question to the experts at Xcel Energy.
“Typically, where you’re going to see the most savings is where you reduce the temperature for about an 8-hour period, consistently,” said Senior Marketing Business Consultant Crystal Manik.
Manik recommends dropping the temperature while you’re sleeping or during the day when you are at work.
“By doing something as simple as that, you can reduce your energy costs by around $100 a year,” Manik said. “This year, we’ve had an incredibly warm fall, going into winter, but I think we all know it’s going to get cold, eventually.”
It’s reason to be proactive now. Though there methods conflict, it’s something the Johnson family is trying to do to get their monthly $163 bill down.
Xcel says in general, most customers take their heat up to anywhere from 64 to 68 degrees for when they’re in the house.
As for that debate to find your household’s perfect temperature, if you crank it up to 90 degrees with hopes of getting the house warmer faster, Xcel says it doesn’t really speed up the process."
"...# Insulate Your Home From the Cold: The first step is to insulate everything the best you can to keep as much heat as possible inside the house. Seal cracks around doors and windows with towels and blankets. At Home Depot you can buy window sealing tapes that you wrap around windows and blow dry to vacuum-seal.
# Limit the area to be heated: Select a space on the "warm" side of the house, away from prevailing cold winds. It's best to avoid rooms with large windows or uninsulated walls. Interior rooms, such as inside bathrooms or closets, probably have the lowest heat loss. Your basement may be another great option in cold weather, because of the heat gain from the earth. Isolate the room from the rest of the house by keeping doors closed, hanging bedding, heavy drapes, blankets or towels over entryways or erecting temporary partitions of cardboard or plywood. Hang drapes, bedding, shower curtains, and such other insulating items over doors and windows. ..
Explore alternative heating methods to electric heat:
Helpful Tips to Keep Warm:
...# Rice Packs: Sandra Cadle suggested the following: "Two pounds of rice placed in a pillow case and tied, is not only great for aches and pains, but will stay warm for long periods, especially if kept under goose down quilts. Since microwaves differ, start heating - 1st 2 minutes, then 30 second intervals, thereafter, refrain from getting wet, and be careful not to burn. When my pooch Pinkie sees my rice bag, she’ll lay on it quick, therefore she has her own ricebag. "
# Heated Bricks (Please also see below: Gas or Charcoal Grills): If you have a gas oven or fireplace, you can heat bricks up to a high temperature. If you have an electric oven and expect a power outage, you can warm the bricks up as a precaution. Remove the bricks when they are warm, but still touchable. Bricks hold warmth for a long time, sometimes days. You can wrap these bricks in towels and warm up your bed or place them under your bird's carrier / cage. You have to make sure that your bird can't actually touch the hot brick. You could place the brick under the grate or even under a metal colander, strainer or under the cage. ... WINTER EMERGENCY SURVIVAL SELF SUFFICIENCY! ARE YOU READY? , from youtube.com
*skip to 7:00 or so to see ways to cook food
"...When you consider buying a washing machine, consider the water usage for top loader vs. front load washing machines. Each type of washer uses different amounts of water, and the savings of using less water can amount to quite a bit per load...
...
Front Load Washer Care and Maintenance
"Caring for your front load washer today prevents future laundry woes."
-Front Load:
"
Finishing a Basement
I am starting a project to finish our basement. Of all the things I need to do, like carpeting, building walls, ceiling, etc.. which one should I do first ?
When finishing the basement, the walls would come first. If you are hanging a suspended ceiling, it would attach (on the edges) to the finished walls, and the floor need only be finished up to the walls.
The first thing to do is to cover your existing exposed foundation walls with a good sealant to make sure you don't have any leakage. then measure every thing ,so that you can make a good blue print for yourself to follow...
Vapor Barrier
Is it required to put a vapor barrier on a new wall in basement even though the wall will be two inches away from concrete foundation?
Required?? no, but recommended. The idea is to keep the moisture from moving through the insulation. If the wall is cold, when the moisture is in the insulation it will condense. The condensation will make the insulation wet and it will lose its insulating ability. Also, the wood in the wall will get wet and the repeated wetting and drying of the wood will cause it to rot.
I also recommend putting plastic on the cement side of the wall too. the reason here is different. Here it is a matter of reducing the dampness and humidity in the basement. If there is a vapor barrier on the inside of the wall, the same problem of wetting and drying the wood can occur and cause dry rot of the wood.
The 6 mil plastic is relatively cheap. It is worth the cost and effort.
Fiberglass Insulation Has Mildew Problems
We insulated our basement two years ago, but recently we found out that it could give problems of condensation and mildew seeping through the dry wall and make the basement room feel mildew. Have we done anything wrong by putting the fiberglass insulation against the wall and paper against the dry wall?
No, you did right. However, basements have moisture problems because they have a high humidity level due to their cooler temperatures and moisture flow through the concrete. One of the best things you can do to combat the mildew is keep the humidity level down. Run a dehumidifier down there all summer.
"Make sure that you use a glossy paint on the trim and on any doors that you might have...Transform one wall of the basement into a mirror. This can make the whole room huge.."
Basement Remodeling: Project Schedules
"The light-colored SunHouse window well, features a sturdy, clear cover that fits nicely and a bottom that prevents weed growth as well as keeps leaves, debris, and rain out. One of the SunHouse's best benefits is that with the clean, light-colored bottom a lot more sunlight bounces into your basement and brightens up a space where we can use all the light we can get."
Minnesota: Complete Basement Systems of MN
1-800-638-5285
When a homeowner sees water leakage coming down from the very top of their inside basement wall, this immediately warrants an outside inspection. ... "..Some Possible Wet Basement Solutions:..
Does your basement leaky or flood? Basement waterproofing
"The 2007 Angie's List award winning waterproofing company that services customers in MD-VA-DC. We fix wet, damp basements & crawlspaces. We also specializes in structural repair. Allow us to make your basement dry again www.fixbasements.com"
Basement Drainage Breakdown "The water then builds up in the backfill and causes hydrostatic pressure which pushes the water into the basement through cracks and joints, most commonly the floor-wall joint. Hydrostatic Pressure on Walls Footing Drain - Ineffective Drainage "....If you have a sump pump installed, you can actively pump the water out of your house. This reduces the need for a natural downhill incline and ensures that the water is being removed. However, the sump pump cannot help you if the footing drain leading to it is clogged and filled with dirt.
Footing drains work, but only for a little while and only if they’re installed so they can drain effectively. ..
Waterproofing, my basemen,t with a, french drain, from begining to end
"Due to a water leak in my basement we had to call Do it right and perform a "french drain" check it out..."
ACTION:
=>Basement Repair Options Sealing Basement Water Out "..Additionally, negative side sealant does not address the problem of water outside of the foundation putting pressure on basement walls. Within the first couple of months or couple of rainfalls, the sealer will begin to blister and peel off and the water will enter in anyways. In the meantime, the continued pressure will continue to work on this crack and others and can cause the water to enter the basement through other areas instead. .. Exterior Basement Waterproofing "...This soil is looser and more porous than ever, meaning it will hold even more water. The water will now run down the drainage board and into the footing drain. If you don't have a steep grade or a deep storm sewer in the street to drain the water to, a sump pump will need to be installed. ..
"..Drainage Tile Instruction
Before getting into the instructions though, you need to understand what a drain tile will do. A drain or drainage tile installation will protect your home against water damage by way of drainage problems by directing the excess water away from your home with the help of a drainage pipe installation and direct it to a waste water or septic system or a sewer. By doing this the seepage in homes is prevented and therefore the foundation of the house is protected. To get to the process of how to go about it, here we go:..
# The drain tile should be placed such that the holes are facing down.
# Once the drain tile is placed securely in, cover the trench with 6 inches of gravel. You can also place in 2 inches of gravel before you place in the tile and 4 atop.....
Drain Tile
"Install a drain tile behind your segmental retaing wall to properly drain water away from the base.
"..A drain tile system runs along the exterior of your foundation. The main purpose of a drain title system is to keep water away from the foundation of your home. The natural flow of water through soil means the water content of the soil can go where ever it wants, which may be right up to and through your foundation. Depending on your climate and water fall, the level of moisture in your soil will vary throughout the year. While you may not have flooding, the water below the surface must run off somewhere. The drain tile system leads that same water through a pipe and away from your foundation. The system consists of a drain tile, which is a pipe with perforations, gravel, gravel cover and a drainage pipe. The water can drain in several ways. A trench must be dug around the foundation. In some cases you may want to rent a back hoe, in others, hand shovels and a hand hoe work quite well....
Step 2 – Dig a Trench
Always check local codes before digging. You will need to know where any gas lines are located. If gas lines are involved you should have the gas company dig your trench. You may also need to obtain permission to drain into the city sewer pipes or directly to the street. You may need to drain into a sump pump if the ground is too level for slopping drainage or simply allow the water to flow naturally down a hill. While a drain tile is generally no more than 4 inches in diameter most areas will require a trench at least 18 inches deep.
Step 3 – Install Filter Paper
Once you have completed digging lay the filtration paper down gentle in the bottom of the trench. The purpose of this paper is to insure that soil and sediment do not enter the drain tile and cause clogging.
...The level of the gravel should be a minimum of 6 inches deep.
Step 6 – Cover the Gravel
It is advisable to cover the gravel with filtration paper, most often, tar paper is used. This gives a secondary barrier to eliminate possible clogging from dirt or debris getting into the drain title. Replace any of the soil on top of the filtration paper.
... French drains and rain drain installation slideshow.mov , from youtube.com
French Drains-DIY
"French drains channel water away from a house or through a garden or bed. This video is part of Landscape Tips with Ahmed Hassan show hosted by Ahmed Hassan . SHOW DESCRIPTION :This show is only available online at DIYnetwork.com."
Vancouver Drainage Company : Installing Perimeter Drainage for Your Home : WaterDrainage.ca
"I found out why water was leaking so much in one corner of my basement wall. There was unfinished concrete rocks along the foundation in the southeast corner of my house. I was about to reroute the 4" preforated pvc pipes around this 3 + foot length concrete blockage around the footing. Instead, I decided to use my 1 inch wide metal stake and sledge hammer to "break" down this section of various concrete rocks (learned it from my sump pump basin project in my internal basement). Thus, saving time and money!
Anyone out there in a similar situation? I would love to hear your story-experience!"
-INTERIOR: Solutions for Monolithic Foundations "...One of the most effective and least invasive methods of waterproofing a basement is with a baseboard system. With this system, weep holes are drilled into the floor/wall joint or, in the case of a block wall, into the walls themselves. Once this is done, a hollow vinyl baseboard is epoxied to the floor. The water creating hydrostatic pressure on the foundation walls is directed into the system and drained to a sump pump system.
The sump pump is installed with a feed pipe to the sump. The sump pump then discharges the water out of the house through a drain pipe that’s buried and runs across the yard.... Drain tile video.wmv , from youtube.com "..See our main website at: http://www.agrateconcept.com ((830) 367-4992 or via email request at rst@agrateconcept.com.)....
Thus, the IPGC Trench Drain can be installed for less cost than either french drain and performs more effectively than either french drain because direct access to the pipe is provided via the open surface slits. ...
lso, the IPGC is currently made with Schedule 40 PVC, so it is a much more permanent solution that the black thin corrugated stuff and the standard perforated pipe. Plus, the IPGC suface trench drain is easier to maintain than any french drain.
=>IPGC Applications, Benefits, & Comparisons, agrateconcept.com "...#
# Essentially, the required trenching to install The IPGC drainage pipe only needs to be deep enough to enclose the pipe up to the open slit bottoms. It may be preferred in some cases to install a thin 2" layer of at least 5/8" diameter gravel to cover the exposed IPGC open slits. The gravel installed with a French Drain must also be sized appropriately to not fill up the perforations.
"http://www.PlumberSurplus.com presents a video buying guide on Sump Pumps, their uses, types and variations, selection and installation. Whether it's a manual sump pump, Little Giant Sump pump, or automatic sump pump our Sump Pump video buying guide helps people break down the complexities." Sump Pumps Buying Guide , hometips.com "..First decide between a pedestal and submersible pump. A submersible is out of sight and earshot, an important advantage if the basement is used as a primary living area. It's also much safer if there are children in the house, but pedestal pumps are less expensive and easier to repair.
Because submersibles sit in water a good deal of the time, they have a life span of from 5 to 15 years. Pedestals, on the other hand, may continue to operate for as long as 25 to 30 years. ..
be sure to choose an automatic one. ..
Extension cords shouldn’t be used with sump pumps.
-Primary Pump
"..
Many new homes have a sump pit already in place, complete with a drainage-tile system under the basement floor that's designed to channel water to the pit. If your home doesn't have this feature, and your water problem affects most of the basement, a retrofit system of this type is a good option. However, it's a big job that involves removing a 24-in.-wide swath of concrete and soil from the inside perimeter of the basement, adding gravel, draintiles and a pit and replacing the concrete.
While this isn't an impossible DIY job, it's backbreaking work. You can pay a professional $2500 to $5000 to do it for you--not necessarily a bad price, though, considering that you'll perhaps double your living space.
A more manageable approach, in the right circumstances, is to install an isolated sump pit with several feet of gravel around it. To have this system installed may cost between $300 and $500. Or, you can devote a few weekends to the job and do it yourself for the price of the pump, pipe and fittings, pit liner, gravel and cement. ..
Preparation
...How will you know where the waterline is? Most service lines that are under the floor enter from the street, usually 4 to 6 ft. from the sewer pipe. If you can't estimate where the water service line might be, check with your local building-codes office. In most cases, these measurements are recorded at the time of installation. ...
There are several ways to break through a concrete basement floor. The economical approach is to use a heavy-duty hammer drill to bore perimeter holes every 4 in., plus additional holes within the area to be removed. After the holes are in place, break the concrete into pieces with a sledgehammer. If you use a rotary hammer, you can handle the job in a similar way and the work should go quicker.
For the cleanest-looking repair, you might consider renting a demolition saw designed for cutting concrete. Use the saw to make 1-in.-deep perimeter cuts and then break out the inscribed area. However, be aware that concrete saws generate a great deal of dust, and most installers avoid them when possible.
We opted to rent an electric jackhammer that uses 120-volt household power. If you decide to do the same thing, the rental cost should be about $30 for 4 hours. With this tool you can get through the hard part fairly quickly and with less strain. To reduce the raggedness of the cut edge, equip the jackhammer with a flat spade bit.
"...#
Step 2
Locate your sump pit at the lowest point of your basement floor (use a level to determine where that point is). The location should be near an exterior wall and located close to an electrical outlet (if possible). The pump will need to be plugged into a GFCI protected circuit....
#
Submersible pumps actually sit in the bottom on the sump pit and are "submersed" in water. A float valve rides on the surface of the water and activates the pump when the water level rises. Since they are underwater, submersible pumps are generally quieter than pedestal pumps.
#
Step 3
Pedestal pumps have their motors mounted on top of a standpipe where the motor won't come in contact with the water, but a float valve on the water surface activates them as well. Since the motor is not in the water, a pedestal pump is usually more noisy that a submersible pump. However, pedestal pumps are often less expensive.
...
"..First, you will need to select a location for the sump. You will want to place the sump near a wall in the basement, since the sump pump discharge will need to exit the basement and travel at least 10 feet outside to discharge. Pick a location that will be easy to work in, and where you can punch a hole through a rim joist to reach outside, but stay at least 8" away from the foundation wall, to avoid hitting any footings....
Once you have selected the location for the sump, you will need to trace the outline of the sump liner on the floor. Leave a 3-4 inch gap around the liner to make it easier to fit the liner in the hole (you will fill in the gap with gravel and concrete later)....
Once all of the concrete has been removed from the opening, you can begin to make the sump hole. You will want to dig the sump hole at least 12" deeper than the sump liner. Use 5-gallon buckets to cart the debris outside.
"Zoeller 31-0249 Radon Sump Basin Zoeller 31-0249 Radon Sump Basin. Buy Zoeller at DrillSpot.com along Radon Sump Basin, Height 22 Inches, Outlet 1.5 Inches, Vent 3 Inches, 18 Inches Depth, Polyethylene pump accessorysump and sewage basinzoeller pump accessory " Zoeller 31-0249 Radon Sump Basin
by Zoeller
Price: $122.47
Sale: $102.06 amazon.com Sump Pump Basin.com "....For this very reason, it is vital not to sink the sump pump basin to more than two feet below the basement level. Deeper than this, the foundation’s main influential zone begins and there is a greater possibility of soil flowing into the sump pump through the holes. .. Radon Mitigation (Sump-Pit Depressurization), from youtube.com
-Connections: Drain tile system not working, selfhelpforums.com "there should be a perimeter drain system outside the foundation.
the block cavities could have water in them in that area...drill a hole in the block cavity at floor level.....have a shop vac ready that's able to handle water or a bunch of towels..." "...The groundwater is pushed into the drain system and not into areas where it can damage carpets, walls or belongings. The water drains by gravity into a sump pit where a sump pump discharges it out of the house.
There are two basic types of drain systems for wet basements. One is a perimeter above-slab gutter system installed at the base of the exterior foundation walls on top of the floor slab. It doubles as a base material for the wall. The other type of drainage system is a below slab perimeter drainage system. The below slab system requires the partial removal of the concrete floor slab and installation of drainage pipe making it more expensive than the base gutter system.
It is believed that an under-floor drainage system is better because the under-floor drains are believed to relieve the hydrostatic pressure before the water reaches the bottom of the floor slab..
*Basement Drainage System "..The best and most reliable approach is the WaterGuard Basement Waterproofing System. While other approaches can work some of the time, this is the one that works all the time. WaterGuard is a piping system engineered specifically for wet basements- designed to avoid the problems of other approaches....
"
Step 1
Make the dry mixture
Basic concrete is made by adding water to a mixture of gravel, sand, and a kind of cement called portland cement. To make the dry mix, combine one part portland cement, two parts sand, and four parts gravel (also called coarse aggregate) in a wheelbarrow or trough. For smaller jobs, you can purchase bags of premixed dry ingredients.
Tip
Start with a moderate amount of dry mix; it becomes difficult to mix large quantities when water is added.
Step 2
Add water
Take a hose and slowly add water to the mix. If using premixed concrete, consult the directions on the bag for the amount of water needed — then measure it into a bucket, and add it to the mix.
Tip
Too much water will result in weak concrete, while too little water will make the concrete unworkable. It’s better to start with less water. You can always add more if needed.
Step 3
Begin mixing the concrete
With a hoe or a shovel, begin mixing the concrete. Make sure all the ingredients are uniformly mixed.
Tip
For large projects, use a gasoline or electric power mixer. Concrete mixed by machine will typically be more consistent — and require a lot less elbow grease!
How to Pour a Concrete Basement Floor
By Glenda Taylor, eHow Contributor eho "
Setting up the Pour
The floor is the last portion of the basement you will pour, after completing the footings and the concrete walls. Usually poured in sections, the basement floor must be level and care taken to prevent future cracking. Unlike pouring an open slab of concrete, the basement floor has the unique aspect of sitting within vertical concrete walls so some special techniques will allow you to smooth the concrete from only one side. Does this Spark an idea?
"
Choosing just the right type of plywood for your construction project can be a confusing task. Many types and grades exist, each suited best for a specific use...
"Basement flooring systems must improve looks of the basement, but more importantly, they should be able to curb humidity, otherwise the basement will become a den of the microbes instead of becoming your favorite haunt. ...
Carpeting, a favorite (and conventional) flooring option, will be a wrong choice for basements....The only problem with tiles (both natural and man-made stuff) is that it makes the floor a bit too cold but you can tackle this chillness simply by placing area rugs here and there.
Remember, you will have to prevent concrete fractures / cracks from affecting the tiling under any circumstance. A crack-isolation membrane will be a good preventive measure...
"..Insulation and Vapor Barriers
Water seepage from groundwater beneath the concrete floor slab can play havoc with any floor choice, but especially with wood. Damage is evidenced by swelling, cupping, and warping. Precautions can be taken to minimize any premature flooring damage and replacement costs with one of several vapor barriers:
* PVC applied over the slab with a multipurpose adhesive.
* 6 mil polyethylene sheets embedded into a skim coat of asphaltic mastic on top of the aggregate bed.
* 15-pound roofing felt embedded into a skim coat of asphaltic mastic on top of the aggregate bed.
A layer of insulation laid on top of the vapor barrier and along the foundation wall edges is beneficial to prevent leaching of heat through the cooler outside wall edges. This is the most crucial recommendation in the process. The insulation layer should be from one to two inches in thickness, according to the climate conditions.
Colder climates should start with two inches of insulation at the outside foundation wall and taper down to an inch toward the center of the basement. The length of the insulated area is recommended at roughly 12 feet from the perimeter toward the center of the basement.
In addition, ensuring proper foundation insulation increases the entire energy-consumption efficiency of a home. Insulating will minimize dampness and heat loss from the concrete slab making contact with the exterior basement wall.
Air-gap membranes of special high-density polyethylene resin or floor matting are newer types of plastic vapor barriers, designed specifically to control moisture penetration in slab-on-grade floors. The durability of the material is evidenced by its impact resistance and capability to withstand heavy loads.
Mold, fungus, and mildew will not develop on this material. The membrane is applied between the concrete and the subfloor. Air-gap membranes and floor matting may be able to suffice as a subfloor, depending on your choice of flooring material. Any type of flooring material is compatible with this vapor barrier material, but adhesives will need to be cleared with the manufacturer recommendations.
Advantages of using this type of vapor barrier involve the dimples on the underside of the material that equalize the pressure from water vapor above and below the concrete slab. The loss of ceiling clearance is minimal at nearly a half inch, depending upon the manufacturer.
This air space or gap allows a healthy humidity level throughout the living area. A thermal break is produced, providing greater comfort and warmth to the entire basement. ..
DMX FlexFloor High Definition Version
"..DMX FlexFloor is the new way to protect your expensive floors and keep harmful mold away from your living spaces.
DMX FlexFloor is a durable, water resistant dimpled sheet made from High Density Polyethylene (HDPE) resin.
Applied to your basement floor with the dimples facing down, DMX FlexFloor creates an air gap which allows moisture from the concrete slab to dissipate easily and prevents the development of mold.
Please feel free to download our brochure at http://www.dmxplastics.com/flexfloor.htm .
... (more info)
(less info) ..
Others: DELTA®-FL - The Warm & Dry Floor System, from cosella-dorken.com
=> FAQ's
-Build Direct
=>
BuildDirect Building Materials Blog-
Information and discussion about flooring, decking, tile, and other products with the BuildDirect Team
Read more: Wood Floor Installation Types | BuildDirect Building Materials Blog "..You say that your space is a concrete slab? Well, you’ll have to strike solid hardwood off your list. But, then again, there’s always engineered hardwood floors. Those can be floated (meaning that they’re installed over the subfloor but aren’t attached), or even glued down in some cases.
Speaking of floating and gluing down, bamboo flooring can be installed this way. Some choices in bamboo can be stapled down as well. Laminates are strictly floating floors, which makes them pretty versatile. They also generally feature glueless click systems, although some installers like to apply glue to the tongue and groove edges for extra hold. This is true of bamboo and engineered floors too.
Read more: Wood Floor Installation Types | BuildDirect Building Materials Blog
-Floor Mall
=>Yanchi Floating Click Engineered Bamboo Natural Horizontal
ARTICLES: Bamboo Flooring Good for a Basement
Contributor
By Nick_Davis
eHow Contributing Writer "..ou may have bamboo flooring upstairs in your house but wonder whether you can install it in the basement. Don't worry---bamboo flooring has a low moisture absorption rate and offers easy installation, making it an ideal choice for your basement...
BLOGS: Questions: Laminate flooring, from houseblogs.net "... * renovationdude * CommentTimeOct 18th 2006
We put Ikea in our basement, it was one of the cheapest. It was over concrete, so we had to use a special underlay. The underlay cost half as much as the floor did. I think the Ikea one looked the best for the price. Home Depot has cheaper stuff, I just didn't like the look of it. We'll see how long it lasts in a basement. ..
-Sheet Rock
How to Remodel a Basement : Basement Remodeling: Drywall
"Hanging drywall is not difficult but it is time consuming. Learn how to hang drywall when finishing a basement from a professional remodeler in this free home improvement video."
"This video is to show people who never taped drywall before, how to apply the compound first over joint, then apply paper tape over joint, and wipe smooth. Tip: for taping walls with butt joints, tape the butt joints first, then when tapping flat joint, the tape will cover ends of tape on the butt, ... Hope that made sense." Drywall tools, doitbest.com Drywall Calculator, homedepot.com Inches to Yards converter, metric-conversions.org
"..Keep in mind that you may need a building permit, depending on the scope of your project. If so, you'll probably have to submit a detailed plan of your proposed project. Before you begin planning your new bathroom, always check with your local building department and find out what codes, specifications and requirements you'll have to meet...
Laminates, however, have been voted the best basement flooring systems to-date. Laminate flooring materials have a moisture resistant backing, which stops the water from traveling up. The resin-based aluminum oxide or melamine top-surface of laminates give basement floors attractive look, at the same time preventing surface stains and scratches from showing up. The same can be said of Vinyl flooring materials.
All this is fine. Nevertheless, a strong sub-floor is a prerequisite to combat the dampness and stuffy smell in basements. A well-set polyethylene plastic covered sub-floor will prevent the moisture from rising up, negating every possibility of sogginess showing up or producing any foul smell in the basement. It also effectively reduces sound. Therefore, no matter which of the basement flooring systems you go for, a good sub-floor will create a perfectly cozy atmosphere in basements, forming the base for high-performance, resilient flooring.
"Most bathtub faucets have two handles that control the hot and cold water supplies and a faucet body that mixes the two and sends them to a single spout that fills the tub. With a lift of the diverter handle, the water is sent from the spout to the showerhead. Always remember to shut off the hot- and cold-water supplies before repairing any faucet..."
"or crosslinked polyethylene) is part of a water supply piping system that has several advantages over metal pipe (copper, iron, lead) or rigid plastic pipe (PVC, CPVC, ABS) systems. It is flexible, resistant to scale and chlorine, doesn't corrode or develop pinholes, is faster to install than metal or rigid plastic, and has fewer connections and fittings... PEX connection methods "...The standard method for connecting PEX pipe to brass PEX fittings uses a copper crimp ring and a PEX crimping tool. The copper crimp ring is inserted over the pipe, the fitting is inserted inside the pipe, and the copper ring is crimped over the pipe and fitting using the PEX crimping tool. Tools, fittings and crimp rings are available from several suppliers....
PEX fittings
PEX fittings are generally made of brass, although some vendors are offering bronze, copper and engineered plastic fittings for PEX. The characteristic ridges on the "insert" part of the fitting distinguish a PEX fitting from other fittings (see pictures below). The ridges, the PEX tube and the crimped copper ring all work together to form a high-pressure seal.... TOOLS:
"...TOOL CALIBRATION:
Before making crimp connection, the tool has to be properly calibrated.
In order to check whether the tool is calibrated or not, make a sample connection and check it with a Go-No-Go gage. If the connection gages properly, no adjustment is required.
If the connection is a No-Go, follow the simple instructions on the tool or see manufacturer's manual. ..
Pex Tubing - How To Install It Right
, By: Tim Rehnnquist articlesnatch.com "..First you need to measure the pex tube. You must cut the tube of equal length from the primary tube with the help of a cutter specifically designed for pex tubes. Make it sure that you dont have any rough edges, so you must hold the tube straight while cutting it to the desired shape.
Next you need to interleave a copper crimp ring through the pipe. Once done, you must put in the pex tube through the fitting. Now, you must shift the copper crimp ring to the upward direction, so that it is positioned at the distance varying from 0.125" to 0.25" from the pex tubing.
Now you need to apply a ring crimper at 90 degree angle over the copper crimp ring. Close the ring crimper and curve the crimp ring. Rotating in 90 degree angle is really important, because if it is not done, then it may produce an uneven cut and also non-uniform crimp, resulting in not being able to cover the ribs.
...
"..If you are installing a new bathroom it is well worth considering consulting a professional bathroom designer to see if there is a wasted corner that could be occupied by a shower enclosure, alternatively you could use the Bathroom Planner on this site to plan your layout. .. Does it fit?, bathroom planner
"Pre-Fabricated Shower Unit
The pre-fab unit can either be a seamless one-piece unit or a multi-piece unit composed of a shower pan and solid side panels. Important: one deciding factor between one-piece or multi-piece units is whether you can get the one-piece unit through the doors of older homes. Homeowners often choose multi-piece units for this reason. ...
How to Reclaim a Prefab One-Piece Shower Stall
Fiberglass shower stalls are fun to reclaim if you like breaking things.
By Josh Peterson
Los Angeles, CA, USA | Tue Mar 03 13:00:00 EST 2009
*
"...Pipes required include the hot and cold supply lines and a pipe leading to a shower head. A mixing valve and shower head are also needed. Air chambers may be required
..
Adding a Bathroom to a Home : Preparing to Install a Shower
*must solder
-> Sweating in a new shower valve, from terrylove.com "I'm not sure what a pro would do, but consider this: if you have room - put a union (flange) near the threaded end that goes into the valve. That way, you can solder all of the pieces up prior to screwing in the piece into the valve. Then, you assembly the already soldered union pieces together and you're done - no soldering pieces while they are threaded into the expensive valve. Depending on how much room you have, this would also let you remove the valve without cutting the pipe. See, once you screw in the adapter, and the adapter is on a rigid set of pipe, it is in there forever...
Just a note...a union doesn't use a washer to seal it. WHen you tighten it down, it actually deforms the copper a little making a watertight connection (think ball and socket). They work best if you install them once. You can take it apart and then reseal, but it is harder to get a good seal. I'm not a pro, but I've found that to be the case in the few I've played with. While sizing and roughing things out (hand tighten to check fit), there's no problem, but once you're finished, put it together, test it for leaks, and then leave it alone. Toilets, Sinks, Showers, Tubs and Disposals - Soldering a shower faucet: Use special fittings?, from forum.doityourself.com
Tub And Shower valve relocate or replace part 5
Soldering a Moen shower valve, from askmehelpdesk.com "Remove the cartridge. Take plumbers sand cloth and shine the pipe back a few inches and with a 1/2" cleaning brush shine the inside of the fitting.
Now paint both pipe and fitting with NoCorrode Solder paste or a acid based paste and join the pipes and valve.
Fire up the torch using a medium tip and apply heat to the the BOTTOM of the fitting while holding the tip of your solder on TOP.
When the solder begins to melt on top run the tip of the solder around the joint. Capillary action will suck the solder into the joint as you run the solder around the joint. Run the solder around several times and let it set it. You have just completed your solder job. Hope this helps, Tom.. 1/2" PEX supply lines to Moen Shower valve , terrylove.com Delta Faucet 75152 Water Amplifying Adjustable Showerhead with H2OKINETIC Technology, Chrome, $29.98 Amazon.com Buy Shower Heads
Delta Monitor Bath Faucet Repair
PERSONAL VIDEO=>
Shower Valve Troubleshooting: Help?
"I've been having "troubleshooting" problems every time I "try" to tighten a part of the shower valve. Water keeps leaking at different parts of the valve. Later in the video, you can see the water coming out of the shower head. Unfortunately, it also comes out from the "back"!! What should I do?
"..When we are beginning to look for a cheap bathroom vanity, we need to determine the style that we are interested in. This will depend on the size of the bathroom, as well as our own personal preferences...
"
Retail Price:
$40.85
Discount:
(-$1.63)
Your Price:
$39.22
" IKEA Bathroom Sinks, ikea.com LILLÅNGEN
Sink cabinet with 1 door
$49.99, ikea.com "
To be completed with LILLÅNGEN sink.
Available in three widths, 15 3/4", 23 5/8" and 31 1/2".
1 shelf included.
Knobs and handles are sold separately.
Hinges included.
INSTALL:
Installing a Vanity and Sink
"Most Common Mistakes
..# When turning the water back on in your home, always run the outside hose valve or flush your toilets to bleed dirt and air from the lines. This debris can cause problems in your sink faucets and other plumbing trim.
Clearance from the side of a bathroom sink to a toilet tank or finished wall should be at least 4 inches while distance to a tub may be as little as two inches. There must also be a minimum of 21 inches from the front edge to a wall or fixture.
..
"...Most of the time when you install bathroom sink plumbing, you'll use PVC pipe for the waste pipes and copper pipe for the water supply. You may use chrome for the waste pipe if the plumbing shows....
"..6. Also, if the wax ring is cold, it will not properly seat. You may need to warm it in the sun for awhile until it is pliable...
7. Use a level to level the bowl, adding shims where necessary. Also be sure the toilet is square and aligned with the wall. Then tighten the nuts and washers onto the bolts by hand.
11. Fill the decorative caps with plumber's putty and place them over the bolt ends. Seal the base of the toilet bowl with plumber's putty or silicone caulk.
..
"It's common knowledge that appliances continue to draw a small amount of power when they're switched off but still plugged in.
One solution is to unplug electronics and chargers when you aren't using them. Or you can plug cords into a power strip and switch it off whenever you want to cut off all power to appliances.
But many consumers wonder if it's worth the hassle to unplug electronics they aren't using. The answer, of course, depends on your objectives.
While it's true that an "informed and aggressive approach can reduce standby use by about 30 percent," according to scientists at the Lawrence Berkeley National Laboratory, "There are more productive ways to save energy with an investment of an hour."
The upshot? If it's easy for you to unplug chargers and other electronics when you aren't using them, then go for it. And no-one says you have to unplug everything. You might want to choose the biggest energy hogs or items that are easily unplugged.
But don't fret if you find the job too tedious or hard to remember. The following actions are all easy and, in some cases, save you more money with much less effort than stamping out energy vampires.
Pick and choose what works best for you from this list, or try everything for an estimated annual savings of $275.
* Activating the power-save function on your computer is a super-easy way to shave up to $90 a year off your utility bills. Exactly how much you save depends on whether you use a laptop or a CPU and a monitor and how long you currently leave your computer on for.
Low power mode also helps equipment run cooler so it lasts longer. Get into the habit of turning off your monitor when you walk away for 20 minutes and your computer when you leave your desk for more than two hours, and you'll rack up even more savings.
* Reduce the brightness setting of your television. Select the "home" mode because the "retail" or "vivid" mode (the default setting for most TVs) uses up to 25 percent more power, according to the Natural Resources Defense Council.
While you're at it, activate the energy- and power-saving modes on your TV and other appliances and save around $43.04 a year.
* Video game consoles, such as the Sony PlayStation 3 and Microsoft Xbox 360, use nearly the same amount of power when they are turned on and left idle as they do when you are actively playing a game or watching a movie.
Save more than $100 a year by remembering to turn off your gaming system whenever you're not using it.
* Switching off unneeded lights will save you $21.04 a year. Does it make sense to turn off the light when you leave a room for a few minutes? Yes for incandescent bulbs. Fifteen minutes is a good rule of thumb for compact fluorescent light bulbs.
Speaking of CFLs, Consumer Reports' tests found that each CFL will save you around $5 a year in electricity costs over a regular bulb.
* Wash your clothes in cold water. You'll reduce your bill by around $18.58 a year and it's better for your clothes.
Even just switching your temperature setting from hot to warm water can cut a load's energy use by half, according to the Department of Energy.
Environmental journalist Lori Bongiorno shares green-living tips and product reviews with Yahoo! Green's users. Send Lori a question or suggestion for potential use in a future column. Her book, Green Greener Greenest: A Practical Guide to Making Eco-smart Choices a Part of Your Life is available on Yahoo! Shopping and Amazon.com."
"
Even with a constant flow of information about energy efficiency, homeowners make major heating mistakes that end in higher electric bills and larger environmental footprints.
Here are 10 of those errors, with the cause and effect of each decision.
1. Maintaining a constant temperature
Cause: A persistent myth suggests that you can save energy by leaving the house at a comfortable 68 degrees (a widely recommended winter setting), even when you are sleeping or away at work.
The idea is that it takes more energy for the furnace to reach a comfortable temperature than to maintain that temperature.
Effect: You could miss out on significant potential energy savings by not using a programmable thermostat and adjusting the temperature overnight and during the workday.
Though the impacts of adjusting the thermostat vary based on your climate and other factors, studies show that knocking the temperature down by 10 degrees for eight hours per day can cut heating bills by 5 to 15 percent.
Sure, the furnace will cycle on for a longer period to return to the more comfortable temperature, but it will be far outweighed by hours of savings when it didn't have to work as hard.
2. Cranking up the temperature to warm up the house
Cause: You come home in the middle of the day to a cold house. You want to warm back up to 68 ASAP, so you crank the dial up to 78 to get the furnace working harder and faster.
Effect: No time is saved in reheating the house. Most furnaces pump out heat at the same rate no matter the temperature. They just cycle on for a longer period to reach a higher temperature.
The furnace will take the same amount of time to return to 68 degrees regardless of the thermostat setting. By cranking up the thermostat, you are likely to overheat the house past 68 degrees and waste energy. Just reset the thermostat to 68, make some hot chocolate, and wait.
"
When it comes to your basement ceiling there are a few factors you must consider. Unlike your first or second floor, where you may have drywall or wood ceilings, your basement ceiling will need to be accessed periodically. For this reason we’ll go into the pros and cons of drywall versus panels, or tiles, and some of the options available to create a nice finished ceiling."
-Drywalls
Sheetrocking, from youtube.com
*use 1-5/8" Drywall/Multi-purpose screws 8 lbs (1520 pieces) Midwest Manufacturing & *pair of screws spaced from each other vertically in each row
Tape Finish Texture Drywall
"1. Disinfecting and Deodorizing Sponges
Don't throw out the kitchen sponge that smells like last night's salmon. Soak it in water spiked with white vinegar or lemon juice, then heat it on high for 1 minute. (Use an oven mitt to remove it.) This will also disinfect any sponges you used to wipe up the juices from a raw chicken. "
"A few of the major criteria that consumers may want to consider are: References from other satisfied consumers; financial stability; number of homes currently underway; ability to meet your timelines; a design team that has designed homes you are comfortable with; and someone you can work with over a long-term complex project...
"Landlords also need to be vigilant about the mold issue. A chronic leaking roof, leaking water pipes, bathroom moisture, or a poorly maintained ventilation system can be an invitation to a lawsuit"
"
Locks and Door Knobs Updating your locks and door knobs is smart, and if you do it yourself you can end up saving a good deal of money. The articles below will tell you how you can easily install a deadbolt or mortise lock, update existing locks, and replace old door knobs. Don’t let your home go through another day without being properly secured!
Common Ways a Door Lock Is Broken "The Lock Has Seized Up
If you can put the key in the lock but cannot to turn it, the lock may have seized because dirt or grime has gotten caught in the mechanism. To clean the lock mechanism, insert a damp cotton bud into the keyhole and joggle it around to attract the dirt. Next, the lock needs to be lubricated. Never use oil for this task. Instead, choose a purpose-made graphite or silicone spray with a directional nozzle. When you have applied the spray to the keyhole, insert the key and wiggle it in the lock to distribute the lubricant evenly.
"..
Installing interior door Trim, or case moulding, around a door provides the finishing touch to a door.
Interior Door Trim Installation is not too difficult for a DIY homeowner to do, as long as he or she has the right tools. I highly recommend the use of a Miter Saw and Nail Gun. In addition, you will also need a level, square, tape measure
, pencil, shims, wood or caulk filler, center punch, 4 penny and 6 penny nails, rag, and some paint/stain. If extension jambs are need to be installed a table saw or skill saw with a fence will also be required...
Pre-Paint or Stain Case Moulding
Prior to installing the case moulding, it is best to pre-paint/stain it. This will provide a cleaner finished look and save time
Trim Pieces
On the top extension jamb, and just above the right and left side extension jambs make a couple of small cross hair marks; one on each side of the doorframe. These marks represent the height of the inside edge of the trim pieces. They also represent the location where the trim pieces line up on the vertical extension jambs. Note that the cross-hair marks should be made such that there is 1/8th to 1/4th inch of jamb reveal.
...Note do not sink nails.
Repeat the same process for the left hand side of the doorframe.
Extension Jamb Installation (If required)
When installing Extension Jambs start out by installing the top piece first. First measure the depth of the required extension jamb (from the existing door jamb to flush with the interior wall).
Once all the extension jambs are tacked in, and are square and level, sink the nails. Then plug and paint them and begin the case moulding trim installation.
"...Casing can be relatively plain, such as the popular clamshell design or square-edge design (called S4S), or detailed, such as colonial-style molding. By far the most popular casing joint design (and the one described in this column) is the mitered picture-frame casing...
Tip: While not absolutely necessary, a power miter saw is far better than a miter box saw, even a professional-quality one. The power saw makes perfect cuts and can also make the very fine tapered adjustments that are often necessary for perfect miter joints. If you can't justify buying one, rent one...
How to Fit & Cut Door Trim
"Length 1:55
Curated 9/17/10 Hosted by howcast.com
Creator's Site www.howcast.com
Doorbells are pretty simple machines, but somehow they still break all the time. They are pretty easy to fix usually, and this video will teach you how to figure out what part of your doorbell is broken and then repair it yourself. "
Doorbells are pretty simple machines, but somehow they still break all the time. They are pretty easy to fix usually, and this video will teach you how to figure out what part of your doorbell is broken and then repair it yourself.
Electrical
-Lighting
Wiring Light Fixtures
"Wiring light fixtures is simple if you know the right steps. AsktheBuilder.com host Tim Carter demonstrates how to wire a light fixture or ceiling light. His tips will allow you to wire up a light quickly and safely."
-Outlets
How to Install Electrical Outlets : Wiring an Electrical Outlet
"
An electrical plug prong that breaks off in an outlet creates two problems, one with the plug, the other with the outlet. The first rule of addressing such a situation is basic: turn off the electricity to that outlet immediately, even if the broken prong is the grounding prong (the bottom of three) on the cord. The grounding prong is the one most subject to damage but sometimes one of the power prongs may break; the wider of the two top prongs carries the current, the other handles the neutral or return wire that completes the circuit. Does this Spark an idea?
"
my daughter yanked my vacuum cord and when i went to pull it out of the wall i realized 1 of metal prongs is stuck in the outlet.. should i be worried if i leave it there??
how do i get it out? thx in advance
"In November 2009 I met with my accountant to discuss how renting out rooms would affect my filing for the 2009 tax year. I brought the following information with me to the meeting: the original real estate listing of the house with room dimensions (so we could calculate the percentage of the house being rented); copies of the rental agreements; copies of my property taxes; and receipts for repairs and updates made to the house. My accountant and I discussed the fact that I would have more forms to complete for 2009 than in previous years, and he assured me that it would very likely benefit my tax situation to be renting rooms...
"..Loan Interest
Interest charged on mortgages and loans financing improvement projects are tax-deductible. Landlords can also deduct interest on credit cards if the funds are used to purchase goods and services related to the rental property’s operations...
"Downsides? Tenants, of course.
I can't help you figure out whether you've got the patience and fortitude to be a landlord. But I can explain to you the generous tax breaks offered to those who rent out their properties. Here's what you need to know:..
"Expenses Paid by Tenant
If your tenant pays any of your expenses, the payments are rental income. You must include them in your income. You can deduct the expenses if they are deductible rental expenses. See Rental Expenses in Publication 527, for more information."
"real estate situation that I hear about often are people considering keeping their first home as a rental while moving onto their second personal residence. The upside is obvious, if they do it right, they get to keep an appreciating property along with the potential extra cash flow that rent brings in. >
The Basics
>
As real estate investing is attractive partly due to the tax benefits, there is a tax rule that some people miss when converting their existing property into a rental.
>
If we take a step back for moment, CRA rules state that if money is borrowed to generate income, then the interest is tax deductible. This applies to rental real estate as well. As the rental mortgage (investment loan) is used to generate rental income, all interest charged on the mortgage is tax deductible in addition to other rental property expenses such as property/water tax, insurance and utilities (if you pay for them).
The Problem
>
All is well a good, but the devil is in the details. For most people, they want to get some cash out of their existing properties to put towards the new place. So they want to refinance their existing homes (ie. HELOC), convert it to a rental, use the HELOC for the new residence down payment, then assume that the mortgage+HELOC is tax deductible because it’s now a rental.
>
However, the new mortgage isn’t entirely tax deductible. Why? Because an investment loan is tax deductible depending on what the money is used for. So if the new borrowed amount is used to pay for a portion of a new principal residence, then the HELOC is not tax deductible.
>
There are strategies floating around supposedly circumventing this rule by transferring assets to a spouse, then buying back the property. To me, these schemes just send a red flag to CRA and raises the potential for audit.
The Solutions >
What’s the right way to do it? Here’s my opinion - If you plan from the beginning that the house is going to be a rental when you move in future, then I would personally pay as little as possible on the mortgage throughout the years of living there, and save the difference as cash. The accumulated cash will serve as a down payment on the future new residence, leaving the rental mortgage untouched and converted to a tax deductible mortgage.
>
Another tidbit of info on a question I get often on the same topic, how does capital gains tax fall into the mix. Capital gains tax is only applicable when there is a profit when you sell. How is the profit determined? On the day of closing, the house to be converted should have an appraised value (if not get one). When you sell the rental in the future, your profit will be calculated as (future value – current closing appraised value).
>
For those of you who own real estate, do you keep your properties after you move?"
Heaters
Baseboard Heater Covers, Easy to Install Baseboard Covers
"Basement remodeling is easy if you take a few steps to ensure the job comes out right. AsktheBuilder.com host Tim Carter shares basement finishing tips from his years of experience. Your finished basement will be much better if you follow his tips. " Walls Framing, from youtube.com
CEILINGS
"..Why should you insulate your basement? If you have no intention of using your basement for anything more than storage, you probably should not insulate your basement. However, if you would like to occasionally spend time in your basement, then insulation
makes sense. Why? Hot air rises and as heat in generate in your basement, it rises to the underside of the upstairs living area and easily penetrates the plywood subfloor and travels upstairs and out of the basement...
All areas of your basement can be insulated including the walls and the ceiling, but the ceiling will offer the most benefit. You may choose to insulate the walls at a later point but this article will focus on the ceiling with the intent that a drop ceiling or recessed ceiling will be installed at a later point...
At this time you may wish to cover the fiberglass batts with plastic sheathing to contain the fiberglass strands. I highly recommend doing so. Purchase plastic sheathing at your home improvement store. Thicker sheathing will not rip easily so I recommend 5 mil sheathing or thicker. Cut the sheathing to size and install it by using staples and attaching it directly to the underside of the floor joist. Continue until you have completed the entire basement and you project is complete. In the future you may wish to install a drop ceiling to tidy up the appearance, but the insulation is complete and your basement will be considerable warmer...
"Flush the Tank Every Six Months
Sediment build up in the tank can reduce your water heater's energy efficiency and also clog your water lines. Avoid these problems and increase the life of your unit by flushing the tank each time you check the pressure relief valve. To flush the tank:"
Electric Water Heater Clean Out
"Question is what can I do about it and how much will it cost me. Obvious
solution is to put a second furnace in the attic. There is good headroom and
access up there so this should be feasable. Ducts fom the furnace to the
area above each upstairs room should be pretty straightforward, but it gets
complicated after that. Running ducts from the ceiling to the basebords will
not be easy. ...
"..Dishwashers - 24" wide (for installation in a cabinet, raising the height, allow 27")
Free-standing and drop-in ranges - 3-" wide
Cook Tops - 30", 36" wide. (Some modular units available in 42" and 48" wide)
Wall Ovens - 27", 30", 36" wide. (Note: since wall ovens are always built-in, actual oven widths vary. The dimensions given here represent the cabinet sizes required.)
Refrigerators - free-standing models, 30 - 36" wide. (Built-in models, up to 48" wide)
Trash Compactors - 15" and 18" wide
Microwave Ovens - Varied
Sinks - Varied, but most are designed to fit in 30", 33" or 36" base cabinets. (Be sure to check manufacturer's specifications on your final selection!).."
Kitchen Planning and Renovation Guidelines
From Coral Nafie, former About.com Guide "..Leave at least 36" for walking between fixtures, appliances, and cabinets.
For ease of movement, you don't want to be cramped. And you need room to open the dishwasher door, cabinets, and the refrigerator. ..
# Leave 30" to 48" of floor space in front of appliances.
You'll need to walk in front of the dishwasher, oven, and refrigerator, and have space to stand at the sink.
# You'll need a minimum of 36" of counter top space for food preparation.
Even if you take food from the freezer to the oven or microwave, you'll need some place to put the containers and serving dishes. 36" is a minimum. More is better.
# Place the dishwasher near the sink.
Your rinsing and washing will be easier if the sink is 36" or less from the dishwasher.
# Have sufficient counter space near the sink.
Install at least 24" of counter top on one side and at least 18" of counter top on the other side of a sink to provide for food preparation, dish washing, and work space.
# Provide proper ventilation for cooking appliances.
A fan should be installed above any surface cooking to allow the air to clear. ..
Base cb f sink w 2 drs/2 fascia pan, white, Härlig white
$77.00 "
The price reflects selected options
Article Number:
398.696.26
Cabinet number::
AK SD
Hinges with snap-on function. Easy to fit on the door without screws, and make it easy to remove the door for cleaning. " FYNDIG
1 bowl inset sink with drainer, stainless steel
$46.98
Article Number:
198.963.67
Sink in stainless steel; hygienic, durable, resistant and easy to clean.
RV 12V KITCHEN STOVE TOP HOOD VENT WITH LIGHT AND FAN, from ebay.com $24.99 VentAhood
-Vent-A-Hood® Range Hoods - Articles:
How To Choose the Right Ventilation SystemWhat height hood do you need? "
Whatever your kitchen’s ceiling height, Vent-A-Hood® can meet your needs. The bottom of a wall-mount or island hood should generally be mounted 30" above the cooking surface, but an under-cabinet hood requires less space (24"–27" for a 9" hood, 21"–24" for a 6" hood). Be sure to account for the height of anything that will be above your Vent-A-Hood, such as a soffit, a cabinet or a duct cover." What is the difference between a ducted range hood and ductless range hood?, prolinerangehoods.com "
Often called a re-circulating range hood a ductless hood will filter the air, generally through carbon filters, and return the air back into the kitchen area. Ducted Range Hoods do not use or need charcoal filters because they remove the air to the outside of the house through “ductwork” this ductwork is normally 6″-10″, depending on the size and requirement of air to be removed. Obviously the fully ducted type of range hood is preferred but this is not always possible." Broan F402411 24-Inch Two-Speed 4-Way Convertible Range Hood, White on White
by Broan-NuTone amazon.com Price: $53.08 "Includes 3-1/4-Inch by 10-Inch damper/adapter and the 7-Inch round adapter
This review is from: Broan F402411 24-Inch Two-Speed 4-Way Convertible Range Hood, White on White (Tools & Home Improvement)
The product was just what I wanted, but with one exception- there is no round damper that comes with the hood. The only damper in the box is for a rectangular duct. Since there is a 30 CFM loss going from rectangular to round I was trying to avoid, I had to order the round damper separately (and pay an additional $10). It was irritating that it was not included, or that I could not specify which damper I wanted. 24" Wide Four-Way Convertible Economy Range Hood
$99.29 menards.com
INSTALLATION:
Basics: Venting Pipe Instruction
"Step by step guide to installing a range hood.
View more D.I.Y. Videos at http://www.bunnings.com.au/learn-how-to-DIY_diy-videos.aspx"
How to Install a Wall Mount Range Hood - PLJW 129
"Detailed info on growing grass seed, as well as a great METHOD here: http://goo.gl/JnHo5
Hit me up on Facebook too:
http://www.facebook.com/LawnCareTips" Grass & Lawn Maintenance : How to Plant Grass From Seed , from youtube.com "Planting grass from seed is the best way to maintain a lush lawn all year round, but laying down a good-quality compost or potting soil is key to helping the seeds take root. Reseed a lawn every spring and fall with lawn care tips from a sustainable gardener in this free video on growing grass."
*preferibly Spring and Fall (Northern U.S.)
Seeding Your Yard
"Whether you're seeding a few bare spots or starting an entire lawn, we'll show you how. Visit yardsmarts.com to learn more."
Peat moss, compost, or straw to cover newly planted seed.
New product from www.painthelpers.com. Learn how to paint your house twice as fast and get very clean lines with this simple trick. Fast way to paint around doors, windows, ceilings, baseboards, crown moulding, cathedral ceilings, vaulted ceilings, and chair rail. If you're tired of getting up and down a ladder all day, you need to watch this video.
"Now you are ready to paint, right? Start by selecting the colors you want to paint the room as well as the surface type (gloss, semi-gloss, eggshell or flat). Generally ceilings are painted flat white. Walls are frequently painted eggshell or flat. However you might choose a semi-gloss for a kitchen or a child's room - it is usually easier to wipe off. Woodwork is usually painted with an oil-base semi-gloss, which tends to have better expansion and contraction properties. When you go to the store to get your paint, don't forget the primer. You will need to prime any new construction or patched areas." Recommended Interior Primers, from house-painting-info.com
"
Before you begin painting your home's interior walls, ceiling, woodwork, doors, or windows, you need to estimate the amount of paint you'll use. Estimates require specific calculations for each surface you want to paint.
To estimate the amount of paint you need in order to cover the walls of a room, add together the length of all the walls and then multiply the number by the height of the room, from floor to ceiling. The number you get is the room's square footage. Is that math class coming back to you now?
Now you have to determine how much of that square footage is paintable surface area. Because you use a different paint on the doors and windows, subtract those areas from the room total. No sweat, just subtract 20 square feet for each door and 15 square feet for each average-sized window in the room. You end up with a number that is close to the actual wall area you have to cover with paint...
Read more: http://www.dummies.com/how-to/content/estimating-how-much-paint-to-buy.html#ixzz0gtCsJXCi
"Summary: As you're finishing your basement remodeling, remember that the painting is what everyone is going to see. Learn how to paint and put on the final touches when finishing a basement from a professional remodeler in this free home improvement video."
PRIMING:
"...Having said that, you are still looking for a paint that is hardwearing. We recommend Benjamin Moore or Sherwin Williams mid to top of the line paints for durability.
Paint can chip fairly easily, and the last thing you want is to have to keep touching up chipped areas every couple of weeks. It is therefore important to use a paint that is designed to take the abuse, and use multiple coats. This will ensure that the paint holds up, and that you do not have to constantly run around repainting damaged areas.
Next, you are probably looking for a paint that is light in colour. Basements are normally not that well lit (naturally speaking), and can be small, dingy places if the decor is not quite right. If you use a light coloured paint, this will instantly freshen up the room and make it appear brighter and airier, which will ultimately make the room seem bigger. ..
"..Do Your Prep Work
First, you need to check the floor to see if it can be painted. Take a plastic trash bag or a piece of plastic drop cloth and spread it over a dry section of the basement floor (at least 1-foot by 1-foot). Using duct or masking tape, tape all four sides to the concrete, so no air can escape from under the plastic. Let it sit for 24 hours. Pull the bag up, and inspect the concrete underneath. If the concrete is damp, you have a moisture seepage problem and the concrete cannot be sealed. If it's dry, you can paint it...
"..have an obvious advantage: They can spread paint, stains, and clear finishes faster than any brush or roller. But just as important is their ability to apply an even coating to uneven surfaces like window shutters and stair balusters — fertile ground for brush drips. And because sprayers atomize liquid into a fine mist, they can create a mirrorlike finish on cabinets or furniture where even minor brush marks are unacceptable. .. Airless Paint Sprayers
An Excellent Way to Paint, from house-painting-info.com "..refers to a method of applying house paint at high pressure to atomize the paint. This method works by forcing the paint, or primer, through a small tip opening at very high pressure. This produces a flat fan of the material being sprayed.... Wagner Spray Tech 520000 Power Tex Texture Sprayer
Other products by Wagner , amazon.com
".. * DO Install a plumbers test plug (available at hardware stores) at the lowest floor drain in your home
* DO Hire a plumber to install a backflow valve on the lowest drain line. Regularly inspect and maintain the valve
* DO Modify the plumbing line so that water is pumped to an upper level drain, eliminating the drains at the lower level
AND, JUST IN CASE:
* Locate and keep accessible the sewer cleanout in your front yard. If you do not have a cleanout, have one installed by a plumber. The cleanout is the property owner’s responsibility
* Check your homeowners insurance policy. If you are not covered for back-ups, call your agent for information on costs and coverage options
* If you experience a back-up, save all receipts related to any repair, cleaning, or damages
..
The Neverflood Lift Station Flood Control System
"Stop basement flooding by having this system installed in front of your home. Forte Plumbing Company has a U.S. Patent on this system. Currently Forte Plumbing Company has this system installed in numerous homes throughout the Chicagoland area."
Extreme makeover home edition helping 100th family
" that song is "how could happen to me" COPYRIGHT ABC NETWORK @ 2007"
*see America
*episode (shown this evening-Sunday, November 25th of 2007) is the Swenson Family (kids lost both parents: mother murdered-see domestic abuse and father killed in a car accident; kids joined their Aunt and Uncle's family) From tragedy to televised triumph
Morris Sun Tribune
Published Wednesday, September 12, 2007
By Sylvia Swenson "
In order for me to tell you how our son and daughter-in-law, Erik and Vicki Swenson, were chosen for the ?Extreme Makeover: Home Edition,? I need to reflect back to a year ago.
Vicki and Erik Swenson and their family admired Erik?s new Harley Davidson motorcycle, which was part of the package for having the massive crew from the TV show ?Extreme Makeover: Home Edition? build the family a new home in Minnetonka.
Vicki and Erik Swenson and their family admired Erik?s new Harley Davidson motorcycle, which was part of the package for having the massive crew from the TV show ?Extreme Makeover: Home Edition? build the family a new home in Minnetonka.
RELATED CONTENT
Morris Sun Tribune Web Icon New home
When we went to visit them in their home in Minnetonka last August, they had just installed a security system. When I inquired about the necessity of the system, Vicki told me that her sister, Teri Lee, had been dating a co-worker and he had become abusive and threatened to kill her after she had broken off the relationship. Teri had pressed charges and gotten a restraining order against the man. Vicki and Erik felt his behavior was so bizarre they felt their lives may be in jeopardy.
Teri had lost her husband in an automobile accident five years before this. She was left to care for their four children, ages 1, 3, 5, and 7. Vicki and Teri shared a very close bond, and Vicki told Teri if anything ever happened to her that she and Erik would raise her children.
Never, in a hundred years, did I ever think that would become a reality.
When our phone rang very early on the morning of Sept. 22, 2006, it was Vicki sobbing and telling me that the man had, indeed, killed her sister.
Everything was a blur for several weeks as Vicki and her parents planned Teri?s funeral amidst never-ending media calls and inquiries. Vicki and Erik did take the children in, and at Teri?s funeral Vicki gave the eulogy and pledged not only to raise the children but also to become a spokesperson for the victims of domestic violence.
Shortly after, Vicki?s volleyball team from Hopkins High School put together a video to send to ?Extreme Makeover: Home Edition? asking that Vicki and Erik be considered for an addition to their home because of their enlarged family.
The circumstances of the story caught the eye of the producers. They called Erik and Vicki and told them they were interested in their story, but they weren?t coming to Minnesota until the summer of 2007. Everything was shuffled about in the house to make room for the additional children.
Erik and Vicki already had a 9-year-old daughter and twin girls about to turn one in October. The three bedroom house they had built 4 years before suddenly was bursting at the seams.
In May 2007, they were contacted by ?Extreme Makeover? and extensively interviewed. In June, they were notified they were one of 15 top candidates. Tension mounted for the entire family in June as they had to endure the trial of the man convicted of murdering their mother and Vicki?s sister.
Luckily, the trial proceeded quickly and the man was found guilty and sentenced to life in prison without parole. The children breathed a sign of relief and seemed less apprehensive about the situation.
In July, they were told they were among the top five candidates for the home makeover. Meanwhile, the ?Dateline NBC? TV show had been following the story and after long amounts of time filming -- from the time of Teri?s funeral to Vicki?s testifying at the Capitol to make changes in the laws against felons who disregard the restraining order and then the trial -- they finally aired their production on Aug 15.
The story was called, ?The Teri Lee Story.? It was a very moving story and difficult for the family to relive the events of the last year. In August , ?Extreme Makeover? told Vicki and Erik they should start to pack some of their treasures ?in case? they were chosen on Aug. 21.
Tension and stress mounted for weeks as ?Extreme Makeover? representatives told them ?if? they were chosen their recently built house would have to be demolished. They had thought an addition would be the likely event if they were chosen. Erik and Vicki had planned and built the house with careful planning and love, and most of the construction was done by Erik. The thought of demolishing it was very difficult to comprehend.
They were told on the day before ?door knocking? that ?if? they were chosen the doors, windows, appliances, fixtures and furniture would be salvaged and given to the needy. That would be more palatable if they thought someone else would benefit from the items in their relatively new house.
On Aug. 21, they were told to be ready ?in case? they were chosen as they would be flown to someplace unknown for a week while their new house was being built. While we were feeling quite certain they would be chosen, there was always the uncertainty that maybe they wouldn?t be.
They were told to close their curtains and blinds and wait for the call from Ty Pennington: ?Good Morning, Swenson-Lee Family, come on out!?
It seemed like forever and then at 9:30 a.m., a large bus pulled up and Ty did get out of the bus with his designer team and beckoned them to come out. Ironically, one of the producers inside the house had the children singing ?the wheels on the bus? so loudly they didn?t even hear the call.
By the second time they did and erupted from the house. They were jubilant to see Ty, the producer, and to know they had been selected.
After a day of packing and filming most of the day they were taken to the airport in a very large limousine and put on the plane to take them to Disneyland in California. Unfortunately, they had to sit on the plane for 2 more hours before it would take off. They arrived in California very tired and the vacation, while grandiose was tiring for a seven-month pregnant mom and the seven children.
The 22-month old twins were a handful and, of course, everyone was busy wondering what was happening back home.
The following seven days were full of activity. On the first day -- a Wednesday -- volunteers emptied the house of their belongings and a salvage team removed the windows, doors, appliances, fixtures, etc. It was amazing as volunteers began to show up in droves. By Day 2, they were ready to demolish. I wasn?t sure I wanted to watch but was drawn to the magnitude of the equipment that was on the site when I arrived that morning.
First, they had the ?Braveheart? march which included employees from 3M and workers from TJB builders. There must have been hundreds of them and they cheered as they rounded the street in unison with banners displaying their companies and ?Extreme Makeover.? True to Hollywood fashion, they would have to repeat it several times to get it just right. After Ty gave the signal the equipment began their demolition and in just 18 minutes the house was nothing but rubble. It was fascinating to watch as dozens of trucks arrived to remove debris and haul in sand and gravel. It was pouring rain and trucks were getting stuck but no one slowed down or stopped. I have never seen such controlled chaos in my life.
By the end of the day, they were putting in forms for the foundation. The cement trucks had to be escorted in by the police as they had some special additive that makes it harden in 20 minutes so time was of the essence to get them there. Huge lights were positioned around the area and everyone worked through the night. It was a 24-hour, seven day operation and no one complained. It was awesome and one couldn?t help but be riveted to the activity.
By Day 3, the builders had begun to assemble the house. Soon the walls and roof were on and the roof was being shingled during the night. The builders were told they needed to be done with their part by Sunday night. Hard to comprehend a 5,600 square foot house being built in that amount of time.
Day 4 was spent putting on siding and landscapers began to show up. One hundred and forty sheet rockers showed up and in two hours had the whole house sheet rocked and taped. They emerged from the house looking like ghosts after the sanding. The designer driveway was installed with beautiful bricks and the landscaping continued to take ones breath away. Huge trees were brought in and a large playground was installed on Sunday, Day 5.
Painting on the interior began. Volunteers continued to come from everywhere. The feeling of camaraderie was contagious. The tent set up to feed the workers was always bustling with activity and people wanting to get back to work. People who couldn?t work during the day volunteered for the graveyard shift of midnight to early morning. Several of the children?s teachers came, as did the co-workers of Erik and Vicki?s from the Hopkins School District. Some said it was like an old barn raising event.
On Monday, Day 6, they held a special ceremony of the builder turning over the keys to the design team from ?Extreme Makeover.? The builders had completed their task ahead of schedule. It was truly amazing.
The design team did their ?extreme? decorating and on Day 7, Tuesday, Vicki?s Hopkins volleyball players and Erik?s Blake football players helped move in the furniture while the onlookers cheered. We were told the family would be returning around 1:30 p.m. and everyone was barricaded behind fences to wait their arrival. We rehearsed ?Move That Bus? so many times we were beginning to lose our enthusiasm and our voices.
The family finally arrived around 3 p.m. in a limousine. The screaming and shouts of jubilation were deafening. Needless to say Erik and Vicki and the children were overwhelmed by the crowd and then their new house. They got to sleep in their new home on Wednesday night after a full day of interviews and filming during the day.
They are all adjusting to the magnitude of it all and, of course, trying to get their lives back on schedule. Vicki had a volleyball game on Thursday night and Erik had a football game on Friday night. The kids were anxious to meet their new teachers on Tuesday.
As they approach the first anniversary of Teri?s death on Sept. 22, the harsh reality of their loss will be difficult. But the knowledge that so many people cared and wanted to help them by building the new house was comforting.
On Sunday, our pastor talked of how hope and love is so important to overcome difficult times in our lives. Erik and Vicki and the children have experienced so much love and hope for tomorrow during the last year that I know each day will bring a brighter tomorrow. As for myself, I was grateful to get back to the farm, pick my produce and begin canning tomatoes. Our family, friends and the community of Hoffman have been so supportive to our family through these difficult times. You can access more pictures and comments on the Web sites of www.tjbhomes.com or www.swensonlee.com. It was wonderful to read all the comments on the blog section of the tjbhomes.com from volunteers that said how moved they were to be a part of such a huge project. Vicki continues her commitment to the Coalition for Battered Women and I am so proud of what she has accomplished already.
The airing of the ?Extreme Makeover: Home Edition? 100th episode will be on Sunday, Nov. 25. It will be a two hour special and the production staff filming told me this is the best episode they have produced so far. I look forward to watching it and hope you will also. " Family with local ties featured on ?Extreme Makeover? TV show Nov. 25
Morris Sun Tribune
Published Wednesday, November 21, 2007 (Morris Sun Tribune) "..The show?s 100th episode will feature the Erik and Vicki Swenson family and will be aired on Sunday, Nov. 25 from 6 p.m. to 8 p.m., on ABC.
Erik is the son of Courtland and Sylvia Swenson who live in Hoffman.... After the show, Swenson-Lees move forward,
Posted at: 11/25/2007 10:38:39 PM (KSTP-TV) "It took one week for the Swenson-Lee family?s three bedroom house to get an ?Extreme Makeover.?
Their story was featured on Sunday?s episode of ?Extreme Makeover: Home Edition.? But Ty and the crew left Minnesota three months ago and a lot has changed since then. There are even some additions to the house.
After living here for three months, the family is still decoding and discovering the extreme features. In Taylor?s room there is a picture with Mona Lisa hidden in it.
"I still haven't found it," said Taylor Lee.
In October, a day before one of the Swenson?s girls turned 2-years-old, one of the stuffed Elmos in the bedroom wall said that tomorrow was Stella?s birthday.
"I was tremendously overwhelmed by all the systems in the house. I certainly never had an irrigation system or a mosquito spray system or a lighting system or a waterfall or any of those things. It's all beautiful, but I had no idea how to run that stuff," said Erik Swenson.
But even in the state-of-the-art home, there were a few things missing.
"We were puzzled that there was no microwave, and then we found it," said Vicki Swenson.
Without room for a microwave in the kitchen, the Swenson-Lee?s have put one in the laundry room.
There are only four bar stools, but there are five older children.
Ty didn?t put any couches in the theatre room, so the family put their old couches inside.
"All I wanted one day was my vegetable peeler cause we didn't get one," said Vicki.
A new security system was installed, with cameras inside and outside the home. The feature is extremely important to the Lee children, whose mother was murdered after her ex-boyfriend broke into their house.
The new house still doesn?t take away the pain. At the most unexpected times, the trauma of Teri Lee?s murder bubbles up. As the crowd was shouting ?move that bus,? Taylor started sobbing when she spotted a security guard who looked like her mother?s killer.
"Here we are at the apex, we're right there to move that bus and bam something like that comes out of the blue and just snaps her out of it," said Erik.
With the help of counselors, the family is working through the trauma together. They are also finding new joy in baby Eva. She was born three weeks ago and was given the same middle name as Teri?s.
The generosity of the community has overwhelmed the family and they have decided to donate many of their belongings and some of the new items the designers didn?t use. The Swenson-Lees family has decided not to buy presents for each other this Christmas, but will buy gifts to help another family."
"I received your fax of the 2003 MN tax return. Unfortunately, Minnesota housing requires the Federal tax return. Please call Tax Copies II @ 1-800-829-1040, and request a copy of your 2003 Federal Tax return. Please let me know if you have questions.
Television"
How to Tile a Floor
By: John Banta and Thomas Baker, This Old House magazine thisoldhouse.com
Planning Ahead 1 Dry layout "
Find the midpoint of each wall and snap a chalk lines on the floor. The line crossing at the room’s center are the starting point of the tile.
Lay a row of tiles along a straightedge more than halfway across the room. For consistent joints, use tile spacers. This row determines the size of cut tiles along the walls.
At the room’s center, place a tile where the chalk lines cross with its edges touching the lines. Measure from one wall (call it A) to the nearest tile edge. Now, go to the tile row and, starting at a joint, measure along the row and mark the distance you just measured. The mark shows the width of the tile at the wall. If that measurement is less than 2 inches, go back to the center tile and move it away from wall A to create a wider cut tile. Spread thinset mortar "Chuck a mixer into a drill and blend the powdered thinset with latex additive—not water—until it’s the consistency of mayonnaise. Let it slake (rest) for about 10 minutes. Mix only as much thinset as you can use in 2 hours. ... 4 Set the tile "..Gently lay a tile on thinset next to the straightedge...
Continue spreading thinset and setting tiles in 2-by-3-foot sections, working from the center of the room out toward the walls. Every few rows, hold a framing square or A-square alongside the edge of the tiles to check that they are square to each other. 5 Final cuts "Make straight cuts as needed with a snap cutter. When waste is more than an inch wide, score tile with one firm stroke, then break by pushing down handle. Smooth cut edge with rubbing stone.
For straight cuts with waste less than an inch wide, score tile on snap cutter, then snap pieces off with nibblers or use a wet saw. ... 6 Notch the tile "..
For curved or scribed cuts, make parallel slices with the wet saw into the waste section, up to but not past the line marking the cut. Then break away the remaining “fingers” with nibblers. .. 7 Fill the tile joints with grout "...
After tile sets overnight, use a margin trowel(buy at titletool.net) to scrape off any thinset from the tile surface or in the joints.
Mix up a batch of grout to a looser-than-mayonnaise consistency. Add water a little at a time by squeezing it from a sponge.
Scoop a trowelful of grout onto the floor and spread it with a rubber float held at a 45-degree angle to the floor. Push grout into the joints by first moving the float in line with the joints, then diagonal to them. Work from the edges of the room toward the center. ..
8 Finishing touches "Allow the grout to set up for 20 or 30 minutes. It should be firm to the touch before you begin washing the tile’s surface. Wipe away grout haze with a damp, well-squeezed sponge rinsed often in a bucket of clean water. ..
"..If your installing base board, chair railing, or door and window casing, you'll need a finishing nailer...
How often will I use a nail-gun?
If you've got a need for a finish nailer and a brad nailer, and you're an avid handyman then you should seriously consider purchasing these tools. Today several companies have compressor nailer combos that are very affordable and would pay for themselves after just a couple handyman jobs. You can even search Ebay for some refurbished models...
Finish Nailer
..Put a little wood glue and drive the right sized finish nail and presto... you've got a solid joint without having to clamp it and wait for the glue to dry. Use it to build basic furniture items like book shelf's or coat racks or make the installation of crown molding, base boards or door and window casings and much more a breeze. As for fine furniture, that's up to the craftsman. Many fine woodworking craftsman tend to stay with traditional wood joining methods and only use metal fasteners where they won't be seen or when they absolutely have to.
Finish nailers are produced by many different manufacturers with professional applications to the affordable home handyman models. They are typically pneumatically driven but cordless models are available. They drive 1-1/4" to 2-1/2", 15 or 16 gauge fasteners, have 1/4" NPT male quick connect fittings and have drive depth adjustments... Brad Nailer
I think Norm Abrams favorite tool is his brad nailer. He uses that thing in just about every project he makes in his shop. The 18 gauge brad nailer is probably the most popular size nailer found in shops today. It's great for attaching trim to a pieces of all kinds since the hole it produces is easily hidden. For the home handyman it's a must have tool.
-Stanley TRE550 Electric Staple/Brad Nail Gun, $29.95from amazon.com
-Arrow Fastener ET200 Heavy Duty Electric Nail Gun, shoots up to 1 1.4-Inch Brads, $57.18 amazon.com "...Great for crown moldings, cabinet drawers, door moldings, railings and more, the ET200 Heavy Duty Electric Nail Gun from Arrow fires brad nail sizes from 5/8-inch to 1-1/4 inches. Featuring 14 amps of driving power, along with trigger and contact-fire safety switches, the ET200 offers plenty of muscle for beefier brad jobs while protecting the operator from accidental misfires. A 10-foot power cord easily spans most workpieces, while hardened steel working parts offer longer tool life. A non-marring contact bumper protects the workpiece for superior frames, furniture, cabinetry upholstery, paneling, and more. ..
"..Basically there are two basic types of finish nailers. The first comes with a coil magazine that holds the nails in long and flexible strips. These are wounded in coils composed of one hundred and fifty to three hundred and fifty nails. The second type comes in stick magazine which holds twenty to forty nails. Finish nailers reviews are not one in proclaiming the best type. Coil magazines are favored because they can hold more nails. They can also be maneuvered well because they are not encumbered with a stick magazine sticking out of the tool. On the other hand, the coil type of nail gun is more expensive than those that have a stick magazine. If you want a coil type of nail gun but lack the resources to buy one, you can pick your choice of reconditioned finish nailers instead. These tools have seen some use but could still have several years of useful life in them.
Cordless nailers should be purchased with their use in mind. If you are in the market for finish nailers, choose one which is light and has been designed for driving nails on delicate wood works such as cabinets, moldings and furniture. For jobs that require more accuracy and precision, select from among the brad nailers that are currently in the market. Cordless models of the tool are powered by small gas explosions which are used to drive the nails into the wood. The gas comes from a cartridge which is disposable. As compared to the pneumatic model of the nail gun, a cordless tool can be carried anywhere. There are no hoses to hamper your movements which make the finish nailers perfect for jobs requiring mobility.. Hitachi NT50AE2 18-Gauge 5/8-Inch to 2-Inch Brad Nailer
Other products by Hitachi , $69.17 from amazon.com
"Home is where the shop is and the factory-reconditioned Ryobi ZRTS1342L 10-inch compound miter saw will be right at home with the rest of you project power tools. With its 14 amp, 5501 RPM motor, this compound miter saw is able to take on a variety of cuts. 2-inch-by-6-inch or 4-inch-by-4-inch at 90-degree cross cuts are easily handled. 2-inch-by-4-inch and 2-inch-by6-inch at 45-degree miter and 45-degree bevel cuts will be a thing of beauty. The ZRTS1342L stops just as fast as it starts with electric braking and the laser will help guide you cutting to perfection. The saw includes a carbide tipped blade, dust bag and work clamp. This is a complete miter saw package. "
Basement Remodeling: Drywall -- powered by eHow.com "Summary: Hanging drywall is not difficult but it is time consuming. Learn how to hang drywall when finishing a basement from a professional remodeler in this free home improvement video."
Fasteners, tpub.com "..SCREWS.— Drywall screws (fig. 5-3, view B) are the preferred method of fastening among professional builders, cabinetmakers, and renovators. These screws are made of high-quality steel and are superior to conventional wood screws. Use a power screw gun or an electric drill to drive in the screws. Because this method requires no impact, there is little danger of jarring loose earlier connections. There are two types of drywall screws commonly used: type S and type W.. DRYWALL' | ToolBarn.com
*use 1-1/4" Drywall/Multi-purpose screws 8 lbs Midwest Manufacturing
*six screws or more vertically in each row (walls)
"Finishing the wall. Ok, now for a bit of artistry! You can make the wall look really good - or really, really bad! Apply a layer of drywall compound in the cracks between the dry wall sheets. The layer should be about 3 inches wide, more or less. Then apply a strip of drywall tape and apply another thin layer of compound over the tape. Then fill in all the screw holes with compound. Try to make the surface and smooth as possible (easier said than done!). After the first layer dries (usually 24-36 hours,) scrape off any uneven ridges or lumps and apply a thin layer of compound with a wide putty knife. Sand smooth and you are ready paint! ..
COMPOUND (Mudding)
"When taping drywall joints, the best method to use is the fiberglass method, in which fiberglass tape is applied directly over the crack between two piece of drywall. Prime and paint drywall to create a nice patch with help from a home repair specialist in this free video on drywall installation. "
SANDING:
All About Water Heaters
Buying a new water heater isn’t necessarily the best way to lower your energy expenses for domestic hot water
Posted on Feb 10 2012 by Martin Holladay, GBA Advisor greenbuildingadvisor.com
" Eccotemp 40HI-NG Indoor Gas Tankless Water Heater, 135,000 British Thermal Unit
by Eccotemp Systems
4.1 out of 5 stars See all reviews (14 customer reviews) | Like 1349480349 false -1 13 13 12 (13)
--------------------------------------------------------------------------------
List Price: $549.00
Price: $429.00 & this item ships for FREE with Super Saver Shipping. Details
Deal Price:
You Save: $120.00 (22%)
amazon.com
"...locate the nearest drain to your water softener. it will either be cast metal or PVC plastic. Most modern homes have PVC plastic drain lines. It could be 1 1/2" to 4" in diameter. After locating the drain line (and this line can be over head) determine what the pipe is made of (Plastic or metal), what size pipe it is, and use the appropriate hole saw for the material.
..
Water Softeners : How Do Water Softeners Operate?
"The basic operation of water softening systems begins with water coming into the house, running through the bypass valve and then undergoing an electrical process that involves the influx of positively-charged particles. Learn about the function of the salt bring tank in a water softener with help from a master plumber in this free video on water softeners."
Water Softeners : How to Maintain a Water Softener
"Water softener maintenance begins with checking the hardness of the system, and continues with checking the brine tank. Learn about the test kit used to determine the hardness of water with help from a master plumber in this free video on water softeners."
*test kit, push valve back and forth once a month, re generate, etc..
"..f your basement water damage was created by some sort of pipe or water related device like the water softener, water heater and pressure tank, then you need to hire the services of a plumber to fix the water damage problem before the water restoration people can begin their job of getting your house back to its original shape and form. The more you can do before they arrive will reduce the total cost of your restoration. ..
"..Hard water is treated most commonly by replacing hard calcium salts with 'soft' sodium (less often potassium) salts. These salt-based ion-exchange systems are typically whole-house and treat all the water going into the house both for washing and cooking. There is an increasing amount of very good data suggesting that ion-exchange softened water is not particularly healthy *and* that hard water has some protective qualities against heart disease. But, on the other hand, ion-exchange systems are effective with very hard water when alternatives are not.
Other methods include what is known as "nano-technology" systems - useful only when hardness is very low, so low as to be almost negligible for practical purposes, "reverse osmosis" which is very effective but will not handle high volume applications, and finally "magnetic technology", otherwise known as smoke-and-mirrors or snake oil. Magnetic systems are very nearly useless even by the maker's own admission.
If I were to advise anyone on the use of water softeners, I would suggest that they were useful for flushing, washing and cleaning in general, for the filling of heating systems, automotive radiators or similar applications. Extremely hard water would also suggest that one would _not_ use softened water for watering plants as the salt content would be quite high. And if one were on a septic system with a leach field large amounts of salt could affect ground water and so forth. But for cooking, drinking or any other food use - even the watering of plants - un-softened water would be best and most healthy. I have done a couple of separations for friends - running home-runs from the service to the kitchen sink cold water side and hose bibs - understanding also that one should _never_ use hot water for cooking anyway. This would be good for a dishwasher as well, by the way as it is fed exclusively with hot water.
...
Water softeners aid the solubility of water. Meaning water is wet....but in order for it to be wetter it gets aided by salt which makes it penetrate things like skin and clothing better. The end result is softer hair and skin and clothing.
Hard water has mineral deposits. These build up causing the appliances and the faucets to have a white milky spotty crust. Softening the water allows it to rinse cleaner.
If your water tests high for minerals Iron, calcium, lime it is important to have a softener. Many rural areas that use well water are very dependant on them..The hardness of the water makes you use more soap and detergent. The cost of the extra soap and detergent is offset by the softener.
Your home ...if the water tests well, probably had a sofenter attached when the water was a different mixture from another source....
"
The first thing you are going to need is a test kit to determine how much hardness and iron you have in your water. If you do not already have one we offer this inexpensive test kit...
Advice for Basement Plumbing Water Leaking Trouble?
Windows
605.237.4658
Winter
Winter Storm Preparation and Survival
"http://www.SurvivalThinkTank.com
Are you prepared for a winter storm? Many here out east were not prepared for 24+ inches of snow. Reportedly the worst storm in the area in 13 years."
"As winter hits its full swing you can still take a few steps to winterize your home. Adding some insulation here, a little plastic window film there can save you real dollars. Here are a few ideas:
Install a programmable thermostat
There are many different brands on the market that range in price from $40 to $100. You can program one to lower the temperature while you're at work or sleeping and save up to 30 percent in a well-insulated home. What's more, outdated thermostats are the weakest link in conserving energy. According to the government's Energy Information Administration, only about 25 percent of U.S. homes are equipped with modern programmable thermostats. They are easy to install; using low-voltage currents, you just attach the color-coded wires from the wall to the corresponding terminals on the back of the unit (W means white, R means red and so on).
Install a high-efficiency furnace or boiler
If your heating system is at least 15 years old, it may be time to consider replacing the unit with a high-efficiency system. These heating systems are at least 94 percent efficient and sip energy as they both heat and cool your home. Another benefit to these units is their ability to be directly vented out of the side of your home, which means you can eliminate your chimney as well when coupled with a high-efficiency water heater.
The pricing of these systems all depends on the size of your home; a qualified contractor will evaluate your home, the number of rooms, number of windows, as well as the type of insulation and protection from the elements your home has and specify a correctly sized unit. The XC95 is a three-stage unit that provides efficiency and comfort and has communication technology to give your service contractor direct information about any problems that might occur. To learn more, visit www.trane.com
Add weather stripping around windows and doors
A project that any homeowner can do, this also has a real impact on drafts and conserving energy. Door thresholds, window caulking and plastic window film (3M makes the best stuff) can go a long way toward staying more comfortable and saving money as well. If you feel a draft around your doors or windows, installing weather stripping and/or window film to the windows can increase the energy efficiency of that opening by up to 70 percent. Door sweeps or draft dodgers can help — like the Twin Draft Guard (www.twindraftguard.com). The investment is small, but the comfort and payback can be huge.
Use portable electric heaters in colder rooms
Even when you do all these improvements, sometimes your home can still feel cold. Many of us use portable heaters to warm up those spaces and while this can be a good solution, care must be taken to select the right heater for your home.
The very first step is to make sure that you have a working smoke detector. If you are unsure when you replaced the batteries, do it now. By using these small units to take the chill out of a room, you avoid the need to turn up the thermostat, which heats up the rest of the home and costs you more money. You can find information about heaters at: www.sunbeam.com; www.holmesproducts.com; www.eco-heater.com
The history of Habitat "...The concept that grew into Habitat for Humanity International was born at Koinonia Farm, a small, interracial, Christian community outside of Americus, Georgia. Koinonia Farm was founded in 1942 by farmer and biblical scholar Clarence Jordan.
The Fullers first visited Koinonia in 1965. They had recently left a successful business and an affluent lifestyle in Montgomery, Alabama to begin a new life of Christian service.
At Koinonia, Jordan and Fuller developed the concept of "partnership housing." The concept centered on those in need of adequate shelter working side by side with volunteers to build simple, decent houses.
..
Clarence Jordan Tribute
"This video speaks shortly about the life of Clarence Jordan, a famous translator of The New Testament. In addition to being an author and translator, Mr. Jordan also found the small but influential farming community in Georgia called Koinonia and was instrumental in the founding of Habitat for Humanity"
*see racism Why Habitat is Needed? "..The state of the world's housing
The world is experiencing a global housing crisis. About 1.6 billion people live in substandard housing and 100 million are homeless, according to the United Nations.(1) These people are increasingly urban residents, and every week more than a million people are born in, or move to, cities in the developing world.(2) Today, a billion people?32 percent of the global urban population?live in urban slums. If no serious action is taken, the United Nations reports that the number of slum dwellers worldwide will increase over the next 30 years to nearly 2 billion.(3)
..
Paid in first
Pioneering Habitat homeowners who have finished paying their mortgages reflect on their ownership experiences.
By Shala Carlson "..Standing on the stage of the Jacksonville, Fla., convention center for a celebration of her achievement and the local affiliate’s building efforts, the bank employee and mother of three watched in wonder as her paid-in-full Habitat mortgage burned away to almost nothing.
"You thank God you were able to do it,” she says. “And then your next feeling is ‘Next month, I don’t have to pay a mortgage! I don’t owe anybody anything on this house!’"
That feeling, she confides, hasn’t faded in the years since. “You want to cry. You want to shout. And at the end of every day, you just thank God."
Harris was the first Habitat Jacksonville homeowner to complete her mortgage payments. In doing so, she is part of an international Habitat for Humanity family—a family that grows larger with each passing day...
Learning lessons
For students, a Habitat house has benefits beyond its four walls.
By Rebekah Daniel "..."The middle school kids had started getting ashamed of where they lived. If the whole neighborhood was poor, and they didn’t notice they were poor, it didn’t bother them. But if they drove through a nice neighborhood to a nice school, they started getting uncomfortable with where they lived."....
Perhaps the most detrimental characteristic of housing problems as far as education is concerned, however, is a high rate of student mobility. While parents chase affordable rents from location to location, move voluntarily to avoid dangerous living conditions or lose their homes after job loss, children negotiate changes of their own, drifting in and out of classrooms, peer networks and curricula. The problem is not only the elusiveness of solids walls and a roof, but the disruption in the child’s sense of community and belonging.
Walls
DRYWALL
"Quer construir com a mais alta tecnologia???? R. BASSANI bassani@bassani.com.br +55(0XX41)3377-1500 "
Thank you for visiting GoodnewsEverybody! Please feel free to e-mail me (Sal) at info@goodnewseverybody.com on any comments, suggestions (e.g. any new websites),complaints, or anytype of feedback to improve this website
or leave a post in my blog.